The Latch Cube is a clever and difficult variation of the Rubik's Cube.
The twelve edge pieces each have an arrow painted on one of the two facelets. A face cannot
be turned in the direction opposite any arrow in that face. Therefore if a face
contains no arrow then it is free to move in both directions, if it contains arrows
all pointing in one direction (clockwise or anti-clockwise) then it can only go in that
direction, and if it contains both types of arrows it is blocked from moving at all.
In the solved position, three adjacent faces each have two clockwise arrows and the other
faces two anti-clockwise arrows. The arrow facelets form a symmetrical 6H pattern. The colour
design is neatly chosen so that the three clockwise faces have darker colours with white arrows,
and the anti-clockwise faces lighter colours with black arrows. It makes it easier to check
whether a face mores or not by checking the colours of the arrows. If it has arrows of both
colours black and white, then it is blocked.
The number of positions:
For any arrow configuration, the edge orientation is already determined, but the two sets of 6 edges
can otherwise be freely permuted. The 8 corners can also be freely permuted and twisted, subject
to the same restrictions as a normal Rubik's Cube - the permutation parity is even, and the total
corner twist is zero. It turns out that the number of arrow configurations is 1,886,816.
This gives a total of 1,886,816·6!2·8!·37 / 2
= 43,125,471,270,862,848,000 positions.
Almost all positions that a normal cube can reach can also be reached on the latch cube.
It is obviously not possible to reach those positions where all 6 faces are blocked from
moving, but there are other unreachable positions too. I made a computer program
to find all reachable arrow configurations, and the result is shown in the table below.
| | Half Turn Metric | |
|---|
Q
u
a
r
t
e
r
T
u
r
n
M
e
t
r
i
c |
| 0 | 1 | 2 | 3 | 4 | 5 | 6 | 7 | 8 | 9 | 10 | 11 | 12 | Total |
|---|
| 0 | 1 | | | | | | | | | | | | | 1 |
|---|
| 1 | | 12 | | | | | | | | | | | | 12 |
|---|
| 2 | | 6 | 84 | | | | | | | | | | | 90 |
|---|
| 3 | | | 72 | 420 | | | | | | | | | | 492 |
|---|
| 4 | | | 15 | 546 | 1,716 | | | | | | | | | 2,277 |
|---|
| 5 | | | | 174 | 2,730 | 6,494 | | | | | | | | 9,398 |
|---|
| 6 | | | | 6 | 1,473 | 12,456 | 21,717 | | | | | | | 35,652 |
|---|
| 7 | | | | | 204 | 8,562 | 50,139 | 61,006 | | | | | | 119,911 |
|---|
| 8 | | | | | | 1,920 | 38,860 | 168,693 | 116,751 | | | | | 326,224 |
|---|
| 9 | | | | | | 48 | 9,945 | 132,903 | 357,477 | 102,563 | | | | 602,936 |
|---|
| 10 | | | | | | | 546 | 26,408 | 230,339 | 289,262 | 24,060 | | | 570,615 |
|---|
| 11 | | | | | | | | 1,002 | 24,165 | 114,037 | 52,320 | 1,665 | | 193,189 |
|---|
| 12 | | | | | | | | 12 | 543 | 6,369 | 13,728 | 2,925 | 36 | 23,613 |
|---|
| 13 | | | | | | | | | 6 | 93 | 966 | 999 | 84 | 2,148 |
|---|
| 14 | | | | | | | | | | | 48 | 168 | 24 | 240 |
|---|
| 15 | | | | | | | | | | | | 18 | | 18 |
|---|
| Total | 1 | 18 | 171 | 1,146 | 6,123 | 29,480 | 121,207 | 390,024 | 729,281 | 512,324 | 91,122 | 5,775 | 144 | 1,886,816 |
|---|
As there are 211·12!/6!6! = 1,892,352 possible arrow configurations overall,
this shows that there are only 1,892,352 - 1,886,816 = 5,536 unreachable configurations, or about 0.3%.
These unreachable configurations break down into three types.
-
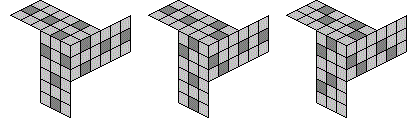 Configurations where all faces are blocked. With 12 arrows and 6 faces, every
face needs exactly 2 arrows (one of each type). There are three ways of choosing
one facelet on each edge piece so that there are two chosen facelets on each face.
They are shown in the picture on the right. Counting rotations and reflections of
these 3 patterns gives 22 patterns. For each face we can choose which arrow goes on
which facelet, leading to a total of 22*26 = 1,408 fully blocked
arrow configurations.
Configurations where all faces are blocked. With 12 arrows and 6 faces, every
face needs exactly 2 arrows (one of each type). There are three ways of choosing
one facelet on each edge piece so that there are two chosen facelets on each face.
They are shown in the picture on the right. Counting rotations and reflections of
these 3 patterns gives 22 patterns. For each face we can choose which arrow goes on
which facelet, leading to a total of 22*26 = 1,408 fully blocked
arrow configurations.
- Configurations where exactly one face can move. Suppose the top layer is the
moving one. If the side faces were blocked without help from the arrows on side of
the moving layer, then the bottom face would have no arrows in it and would also be
able to move. Therefore there must be at least one side face that is only blocked due
to an arrow on the side of the top layer. As that side needs to be blocked regardless
of the position of the top layer, this means that the top layer has identical arrows
on all its sides (either of the 2 arrow types). It is easy to arrange the remaining
arrows so that all other faces are blocked (284 ways to do that), leading to 6*2*284
= 3,408 arrow configurations with exactly one movable face.
- Configurations where only two opposite faces can move. The reasoning above applies
to this case too. At least one moving layer must have all the same arrows on its sides.
You could let the opposite moving layer have arrows on its sides too, opposing the
first layer, leaving you free to arrange the remaining arrows in the middle layer in
any way you like (48 ways). Or you could put opposing arrows in the middle layer, one
on each face (2 ways), and then put the remaining arrows in the bottom layer in any
way that allows it to move (18 ways).
There are 6*48 = 288 arrow configurations of the first type, 6*2*2*18 = 432 of the second,
and no others.
Notation:
I will use a notation similar to normal Rubik's Cube notation. The six faces are denoted
by the six initial letters of the words Up, Down, Left, Right, Front, and Back (U, D, L, R, F, B).
The location of any edge piece can be specified by two letters, and a corner by three letters.
For example URF means the corner shared by the front, right, and upper faces.
A single letter can also denote a clockwise quarter turn of that face. An anti-clockwise turn
is denoted by the letter followed by an apostrophe (e.g. L'). For a half turn or a three-quarter
turn this is followed by a 2 or 3 respectively. For example L'3 denotes an anti-clockwise
three-quarter turn of the Left face. On a normal cube this would have the same effect as the
move L, but on the Latch cube that might be blocked.
Solution:
Phase 1: Separate the arrows
In this phase you must separate the two types of arrow, moving all the
white clockwise arrows into three adjacent faces (faces which share one corner),
and the black anti-clockwise arrows to the other three adjacent faces. It does
not matter what colour the face centres are, as that will be fixed later.
It is impossible to describe how to do this phase in a universal way, so you
will have to figure it out case by case.
Phase 2: Place the arrows
In this phase you will put the arrows in the 6H pattern, i.e. two arrows
on opposite edges in each face. Note however that there are two possible 6H
patterns, which are mirror images of each other. It does not matter which of
the two patterns you get, as that will be fixed at the end.
- Hold the cube so that the white (clockwise) arrows are in the U, R, and F faces.
- Look at the three edges adjacent to the URF corner. We want their three arrows
to be in different faces. If this is not yet the case then hold the cube such that
the face with exactly one of those arrows is the R face, still with U and F being the
other clockwise arrow faces. Then do the move sequence R U3 R3 U.
- If the three faces do not all have exactly 2 arrows in them, then hold the cube such that the
U face has 2 arrows, and do D' F3 D'3 F.
- All three faces now have two arrows. See which faces have their arrows on adjacent edges,
and which on opposite edges.
- If one or more of the three faces has its arrows adjacent, then hold the puzzle so that
those three clockwise faces are the U, R, and F faces with F being one of those with adjacent
arrows. Do D' F3 D'3 F once, or twice, until the front face has two arrows which are on opposite edges.
- Repeat step e until all the clockwise faces have their arrows opposite.
- The next step is almost the same as step b, but applied to the faces with the black anti-clockwise arrows.
Hold the cube so that the black arrows are in the U, R, and F faces.
- Look at the three edges adjacent to the URF corner. We want their three arrows
to be in different faces. If this is not yet the case then hold the cube such that
the face with exactly one of those arrows is the R face, still with U and F being the
other black arrow faces. Then do the move sequence R'3 U' R' U'3.
Phase 3: Solve the face centres
- Hold the puzzle so that the front face has white arrows at the top and bottom. If
this front face does not have a dark colour centre (blue, grey, red; the colours
that have white arrows) then do U2 D'2 (or U'2 D2) to swap the arrow colours.
- Repeat step a until all faces with white arrows have a dark centre.
- Hold the puzzle so that the white clockwise arrows are in the U, R, and F faces.
- If the arrows in the U face lie at the front and back, then do U D'2 B'3 D'3 R' U3 R F L' to
switch to the correct 6H pattern of arrows.
Phase 4: Solve the edges with white arrows.
In this phase you will mostly use two move sequences:
a. UR->FU->RF: F3 U F U2 R U R3
b. UR->UL->FU: F3 U2 L' U2 L'3 F
Note that you can apply sequence b in different orientations to permute
the three edges in the R or F faces:
c. RF->RB->UR: U3 R2 B' R2 B'3 U
d. FU->FD->RF: R3 F2 D' F2 D'3 R
- Hold the puzzle so that the white clockwise arrows are in the U, R, and F faces.
- Put the correct piece at the DF location as follows:
1. Locate the edge piece that belongs at the DF location.
2. If it lies in the U face, then bring it to the FU location using move sequence b once or twice.
3. If it lies in the R face, then bring it to the RF location using move sequence c once or twice.
4. Do move sequence d once or twice to bring the piece to the DF location.
- Put the correct piece at the RB location as follows:
1. Locate the edge piece that belongs at the RB location.
2. If it lies in the U face, then bring it to the UR location using move sequence b once or twice.
3. Do move sequence c once or twice to bring the piece to the RB location.
- Put the correct piece at the RF location as follows:
1. Locate the edge piece that belongs at the RF location.
2. If it lies at the UL location, then do move sequence b.
3. Do move sequence a once or twice to bring the piece to the RF location.
- Put the correct piece at the FU location by using move sequence b once or twice.
- If the UL and UR edges need to be swapped, then do F3 U2 B'2 U2 B'2 U2 F.
Phase 5: Solve the edges with black arrows.
This phase is almost the same as phase 4, except in mirror image. You will mostly use two move sequences:
a. UF->RU->FR: R'3 U' R' U'2 F' U' F'3
b. UF->UB->RU: R'3 U'2 B U'2 B3 R'
Note that you can apply sequence b in different orientations to permute
the three edges in the R or F faces:
c. FR->FL->UF: U'3 F'2 L F'2 L3 U'
d. RU->RD->FR: F'3 R'2 D R'2 D3 F'
- Hold the puzzle so that the black anti-clockwise arrows are in the U, R, and F faces.
- Put the correct piece at the DR location as follows:
1. Locate the edge piece that belongs at the DR location.
2. If it lies in the U face, then bring it to the RU location using move sequence b once or twice.
3. If it lies in the F face, then bring it to the FR location using move sequence c once or twice.
4. Do move sequence d once or twice to bring the piece to the DR location.
- Put the correct piece at the FL location as follows:
1. Locate the edge piece that belongs at the FL location.
2. If it lies in the U face, then bring it to the UF location using move sequence b once or twice.
3. Do move sequence c once or twice to bring the piece to the FL location.
- Put the correct piece at the FR location as follows:
1. Locate the edge piece that belongs at the FR location.
2. If it lies at the UB location, then do move sequence b.
3. Do move sequence a once or twice to bring the piece to the FR location.
- Put the correct piece at the RU location by using move sequence b once or twice.
- If the UF and UB edges need to be swapped, then do L3 R'3 U' R' L, and go back to step c.
Phase 6: Position the corners.
In this phase you will mostly use two move sequences:
a. URF->ULF->URB: U2 L' U R U3 L'3 U R3 U
b. URF->ULB->URB: U3 L' U R U3 L'3 U R3
- Hold the puzzle so that the white clockwise arrows are in the U, R, and F faces.
- Find the corner piece that belongs at the DBL location. If it is already in its correct location, then skip to step f.
- Hold the puzzle so that that corner piece lies at URF, URB, or ULB, still with the white arrows in the U, R, and F faces.
- Move the corner piece to the ULB location, if it isn't already, by using move sequence b once or twice.
- Put the corner in position by applying the move sequence B' L'3 B'3 L' three times.
- If the three locations ULB, DFL, DBR are all solved, then skip ahead to step l. If not, then
find one of the unsolved corner pieces that belongs at one of those three locations.
- Hold the puzzle so that that corner piece lies in the U face, still with the white arrows in the U, R, and F faces.
- Move the corner piece to the URF location, if it isn't already, using sequence b twice if it is at UBL or sequence a once or twice otherwise.
- Hold the puzzle so that that corner piece lies at URF, and the location where it belongs at ULB.
- Apply sequence b to solve the corner piece.
- Repeat f-j until those three locations are solved.
- If the three locations UFL, UBR, DFR are all unsolved, then do move sequence a once or twice until one of then is solved.
- If there are three unsolved corners left, then hold the puzzle so that they lie at UFL, UBR, UFR, and do move sequence a once or twice until they are solved.
Phase 7: Orient the corners.
In this phase you will use three move sequences:
a. UFR-, ULF+: D'3 R2 U3 R3 U R3 U3 D' R2 D'3 R D' R U
b. UFR-, ULB+: U3 F3 U2 F U R U R3 U R U2 R3 U3 F3 U3 F
c. UFR-, DBL+: R3 D'2 R U3 F'3 R2 F' R3 D'2 R F R2 F3 U
- Hold the puzzle so that the white clockwise arrows are in the U, R, and F faces.
- If the DBL corner is not oriented correctly, then do sequence c once or twice until it is correct.
- If the puzzle is not yet solved, hold it so that the white arrows are in the U, R, and F faces and at
least one of the ULB or ULF locations has a twisted corner.
- If the ULF corner is not oriented correctly, then do sequence a once or twice until it is correct.
- If the ULB corner is not oriented correctly, then do sequence b once or twice until it is correct.
- Repeat steps c-e until the puzzle is solved.
