
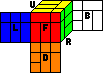
The Bandaged Cube puzzle can be made from a standard Rubik's Cube by gluing pieces together. Seven of the corner pieces are glued to edges to make seven 2x1x1 movable pieces. The five remaining edges are glued to the face centres; one glued to two adjacent centres, and the others are glued one on each face.
The glued pieces make this puzzle very difficult because moves are very often blocked. It is a little like the Square One puzzle, in that the possible positions do not mathematically form a group. Nearly all other moving piece puzzles do form groups because they are in effect (isomorphic to subgroups of) permutation groups, usually generated by the simplest possible moves. On this puzzle not every move is possible at every moment so the face turns cannot be considered generators of a group.
From a computer search I found the following:
| Face turn metric | |||||||||||||||
|---|---|---|---|---|---|---|---|---|---|---|---|---|---|---|---|
| Q u a r t e r t u r n m e t r i c |
0 | 1 | 2 | 3 | 4 | 5 | 6 | 7 | 8 | 9 | 10 | 11 | 12 | Total | |
| 0 | 1 | 1 | |||||||||||||
| 1 | 6 | 6 | |||||||||||||
| 2 | 3 | 14 | 17 | ||||||||||||
| 3 | 9 | 22 | 31 | ||||||||||||
| 4 | 1 | 23 | 32 | 56 | |||||||||||
| 5 | 8 | 38 | 33 | 79 | |||||||||||
| 6 | 1 | 12 | 40 | 21 | 74 | ||||||||||
| 7 | 1 | 16 | 26 | 17 | 60 | ||||||||||
| 8 | 2 | 13 | 23 | 12 | 50 | ||||||||||
| 9 | 4 | 12 | 11 | 6 | 33 | ||||||||||
| 10 | 5 | 2 | 6 | 2 | 15 | ||||||||||
| 11 | 1 | 2 | 3 | 3 | 9 | ||||||||||
| 12 | 1 | 1 | 1 | 2 | 5 | ||||||||||
| 13 | 1 | 1 | |||||||||||||
| 14 | 2 | 2 | |||||||||||||
| 15 | 1 | 1 | |||||||||||||
| Total: | 1 | 9 | 24 | 54 | 83 | 91 | 64 | 58 | 28 | 16 | 6 | 3 | 3 | 440 | |
There are 440 configurations, i.e. there are 440 positions if the colours of the pieces are ignored, and it takes at most 12 moves (or 15 if half turns are counted as two moves) to get to the same configuration as the solved position (free corner at UFR, face centre edges at UL, RB, FD, LD). Once in this configuration only the seven glued corner/edge pieces need to be swapped about in order to solve it.
| Half turn metric | Quarter turn metric | ||||||||||||||||||||||||||||||||||||||||||||||||||||||||||||||||||||||||||||||||||||||||||||||||||||||||||||||||||||||||||||||||||||||||||||||||
|---|---|---|---|---|---|---|---|---|---|---|---|---|---|---|---|---|---|---|---|---|---|---|---|---|---|---|---|---|---|---|---|---|---|---|---|---|---|---|---|---|---|---|---|---|---|---|---|---|---|---|---|---|---|---|---|---|---|---|---|---|---|---|---|---|---|---|---|---|---|---|---|---|---|---|---|---|---|---|---|---|---|---|---|---|---|---|---|---|---|---|---|---|---|---|---|---|---|---|---|---|---|---|---|---|---|---|---|---|---|---|---|---|---|---|---|---|---|---|---|---|---|---|---|---|---|---|---|---|---|---|---|---|---|---|---|---|---|---|---|---|---|---|---|---|---|
|
|
|
| ||||||||||||||||||||||||||||||||||||||||||||||||||||||||||||||||||||||||||||||||||||||||||||||||||||||||||||||||||||||||||||||||||||||||||||||
This shows that the puzzle can always be solved in at most 28 moves (18.801 on average) or 35 if half turns count as two moves (21.938 on average).
In Sloane's On-Line Encyclopedia of Integer Sequences these are included as sequences A079770 and A079771.
Once in a given configuration, the positions in such a configuration do form a (permutation) group. It is generated by the application of move sequences that return the puzzle to the same configuration. It turns out that only even permutations of the glued corner/edge pieces can occur. The reason is quite subtle: Note that for a face to move, it must contain the unglued corner piece. Any sequence of moves that permutes the pieces, bringing them back to the same configuration must have an even number of quarter face turns to bring the free corner back to its original position, and therefore must be an even permutation on the seven glued corner pieces.
There are 440 configurations, and in each of these the 7 glued pieces can have any even permutation. Therefore there are 440·7!/2 = 1,108,800 positions.
 Unlike the Rubik's Cube, this puzzle has a fixed orientation, i.e. it matters
which way up you hold it. First find the edge piece that is glued to two
face centres, and hold the puzzle so it is in the DB position. Now find out
the colours of the unglued corner, wherever it is on the puzzle. If the
colours match those of the F, U and R face centres then you are holding the
puzzle correctly for the solutions below to work. If they match the F, U and
L face centres then turn the puzzle over so that the F and U faces swap
places. If neither of the two cases above holds, then you have a puzzle that
is glued differently, and the solutions below will not help you much.
Unlike the Rubik's Cube, this puzzle has a fixed orientation, i.e. it matters
which way up you hold it. First find the edge piece that is glued to two
face centres, and hold the puzzle so it is in the DB position. Now find out
the colours of the unglued corner, wherever it is on the puzzle. If the
colours match those of the F, U and R face centres then you are holding the
puzzle correctly for the solutions below to work. If they match the F, U and
L face centres then turn the puzzle over so that the F and U faces swap
places. If neither of the two cases above holds, then you have a puzzle that
is glued differently, and the solutions below will not help you much.
In the solved position the U face edge is at UL, the R face edge is at RB, the F face edge is at FD, and the L face edge is at LD.
Phase 1: Bring the puzzle into the right configuration
This is quite a complicated process, but the following steps will do this in
a fairly direct manner.
Phase 2: Place the LBD piece correctly
Phase 3: Place the RDB piece correctly
Phase 4: Place the LFD piece correctly
Phase 5: Place the RFD piece correctly
Phase 6: Place the top layer pieces correctly
Phase 1: Bring the puzzle into the right configuration
See Solution 1.
Phase 2: Place the LBD piece correctly.
Phase 3: Place the FRD piece correctly.
Phase 4: Place the BRD piece correctly.
Phase 5: Place the remaining pieces correctly
There is a very neat proof of this. I'll just give the bare outline here. First consider the main sequence used in the solution. This can be performed in 3 orientations (that is what A and C are for) and also in reverse. This gives 6 basic move sequences. Any move sequence of the F/R/U faces can be built by combining these 6 basic ones. This is the trickiest but least interesting part of the proof so I'll skip it. These basic move sequences perform 5-cycles on the pieces of the puzzle, so it remains to be seen what positions are attainable by combining these 5-cycles. An easy way to show that these give no more than 60 positions is by looking at an icosahedron. Each pair of opposite corners of the icosahedron can be identified with a piece so that the 5-cycles correspond to rotations of the icosahedron. The icosahedron has only 60 different orientations so there can be no more than 60 positions generated by the 5-cycles.