This new version of AutoScribe Plus works on both the four line screen of the Psion Organiser Model LZ or LZ64 and the two line screen of the Models CM or XP. The pack will automatically detect whether you are using a two line or four line model and adjust its screen display accordingly.
On both two and four line screens, the top line always displays the line number and character position. On a two line screen the second line is used for editing. On a four line screen the third line of the screen is used for editing, and the second and fourth lines show the lines before and after the one being edited.
Line 1:11 <top> Felix Holt - G. Elio Twenty-two years bef
If the line being edited is either the first or last, the message <top> or <end> is shown above or below the current line.
The other major change to AutoScribe Plus is that, when you start to edit a document, the program no longer asks whether you want to start at the top or bottom of the text. The new version can automatically detect which line you were looking at last and it takes you straight back to where you left off.
If you have written AutoScribe Plus documents on a XP or CM and saved them onto a Datapak or Rampak, you can move the pack to a LZ and edit the same documents on the four line screen.
The only difference between documents on two and four line machines is that some special characters cannot be transferred between two sorts of machine. The section on special characters below explains this further.
The two line and four line machines have different character set. The character set for the XP and CM is illustrated in the appendix to the XP and CM manual. The character set for the LZ and LZ64 is illustrated in appendix A of the programming manual.
Most characters are unchanged on the LZ models, but the character numbers used for some accented or currency characters have changed.
For instance, the character number which is used for pound sign on a two line machine is used for an accented ý on a four line machine. So if you create a document containing a pound sign on an XP and then transfer it to an LZ the pound sign will change into an accented ý. The only way to correct this is to delete all the XP pound signs and substitute in the LZ pound sign.
When the LZ and LZ64 are used in languages other than English, SHIFT and RIGHT ARROW are used to create accented characters such as ç or á.
When you run AutoScribe Plus with an LZ or LZ64 running in English, SHIFT and RIGHT ARROW will move a word right. If your LZ or LZ64 is set to run in any other language, you will not be able to use SHIFT and RIGHT ARROW to move one word right.
On a model LZ, pressing SHIFT and SPACE inserts a new line into a record. If, however, you install the CUT code on a model LZ, pressing SHIFT and SPACE will copy the current line into the CUT buffer.
On a XP or CM, you can cut and hold up to 16 lines at once. Since each line on an LZ is longer, you can only cut and hold up to 12 lines at once.
By popular demand, AutoScribe Plus no longer beeps every time you press the MODE key while you are editing (in contradiction to the example on page 19 of the manual).
The default margin is now zero, rather than 10 spaces as stated on page 40. If your line length is 60 and you set a margin of 10, your total line length will then be 70 characters.
All rights reserved. This manual and the programs referred to herein are copyrighted works of Widget Software Ltd.
Psion Organiser II is a trademark of Psion plc.
If within 12 months of purchase this software can be shown to the reasonable satisfaction of Widget Software Ltd to be faulty and not to function substantially as described in the user manual, Widget Software Ltd will refund the purchase price or replace the product. Apart from this warranty, Widget Software Ltd will not in any event be liable for loss, including consequential loss, caused by any error, defect or failure of the software, or howsoever otherwise arising, including but not limited to loss of use, loss of stored data, loss of profit or loss of contracts.
Cartoons by John Redmond, Leicester
Written on AutoScribe Plus and WordPerfect 5.0
Printed by Triographics, Knebworth, Herts
Developed by M. O'Regan and R.L. Masters
AutoScribe Plus Manual
Table of contents
Chapter 1
INTRODUCTION
Tips for using this manual;
Pressing keys;
Emergency Exit
Chapter 2
MEMORY PACKS
Memory requirements;
What is a document ?;
Storing Documents;
CM model;
Rampaks and Datapaks;
Copying documents;
Copy Protection;
Copying AutoScribe Plus
Chapter 3
STARTING FOR THE FIRST TIME
Installing the letters WP;
Document name;
The AutoScribe Map
Chapter 4
THE EDITOR
How to leave the editor;
Writing your novel;
Typing in text;
Word wrap;
Moving around;
Deletion;
New Lines
Chapter 5
THE [MODE] MENU
Single Capitals;
Special characters;
Type;
Lineln;
Goto;
CentLine;
OFF
Chapter 6
THE DOCUMENT MENU
Edit;
List;
Newdoc;
DEL;
Search;
Viewing;
Searching backwards;
Replace;
Print;
MARGIN;
EPSON;
Transmit and Receive
Chapter 7
CUT
Installing CUT;
Removing CUT;
Using CUT;
The hot keys
Appendix 1
More on special characters
User defined printer drivers
Appendix Two
Converting Text Files to AutoScribe Plus Documents
AutoScribe Plus is a stand-alone word processing system for the Psion Organiser II. You can use it to write text for any purpose. For example you can use it to write a letter, a memo to a colleague, a note to yourself, or to record a quotation or nugget of information which you want to retain.
If you are of a creative disposition, you may like to write poetry or prose. Thanks to the portability of the Organiser and AutoScribe Plus, you can do this well away from the madding crowd.
Chapters one, two and three of this manual are designed to be read when you first start using AutoScribe Plus. Chapters four, five, six and seven cover different areas of AutoScribe Plus in detail. You can use AutoScribe Plus without knowing ail of this detail.
If you later find that you want to know about a particular feature, look it up in the index, which will refer you to the page you want.
Throughout this guide, specific key presses are shown as [KEY]; for example [EXE] means 'press the key marked EXE'.
Although you face many different choices when you are using AutoScribe Plus, we have tried to make certain keys convey similar messages throughout the program.
In AutoScribe Plus, pressing [EXE] usually means that you agree to what AutoScribe Plus is suggesting, or that you confirm what you have said you want to do. Throughout AutoScribe Plus, [EXE] is the key which means "Yes, I want to go on to the next stage."
The other key which generally signifies assent is the [Y] key. You may be asked a question along the lines of "Did you really mean that Y/N ?". If you press [Y] (or sometimes [EXE]) at this point, AutoScribe Plus will assume that you know what you are doing and press on with whatever it was about to do.
[ON/CLEAR] (which is the key in the top left hand corner of the Psion Organiser II keyboard) is used to mean the opposite. Pressing [ON/CLEAR] is used to mean such things as "I didn't mean that" or "Get me out of here" or even "Stop that you stupid machine".
In case of emergency, try pressing [ON/CLEAR] followed by [Q] a few times. In almost all Organiser programs this is the emergency exit, which will stop what you are doing and dump you back on the street outside. You may have to try it several times if the program running is involved in a complicated procedure.
Remember to check the Psion Organiser II Operating Manual for further information on general operation of the Organiser itself.
Datapaks are better for long term storage. RAM is better for data which is going to be changed many times in a short period.
We suggest that you create or edit documents on a Rampak or in the A: drive in the Organiser's in-built memory, only saving them to Datapak when they are finished.
Editing a document on a Datapak uses up the space on the Datapak, uses up your battery and slows down the speed at which AutoScribe Plus can work.
The Organiser's memory system is arranged like a three drawer filing cabinet. The top drawer is the A: memory. The second drawer is the B: memory and the lowest drawer is C:.
The amount of space you have in the A: drawer depends upon which of the models in the Organiser range you have bought. The amount of space in B: and C: depend upon the size of Datapak or Rampak you have bought. You can change the amount of memory available on B: and C: by simply changing pack, but you cannot change the amount of memory in A:.
A lot of different parts of your Organiser are competing for space in the A: drawer. Imagine that your drawer contains a number of folders. The SAVE command puts its information in a folder in A:. The Diary puts its information in a folder in A:. The Comms Link needs a lot of space in A: for its information, too.
In addition to the space used by these folders of static information, each program run on the Organiser needs to use space in A: when it is running.
When you run AutoScribe Plus, it needs to use space in A:, even before you start to enter text. AutoScribe Plus needs a minimum of 5 K Bytes to run, plus the memory needed to store the text. If you store the document you are writing on a Rampak or Datapak, you will only need 5 K Bytes free. If you are writing a document in A:, you will need 5 K Bytes plus the number of bytes needed for the document.
If you are in any doubt as to the number of bytes left in your A: memory, use the Organiser's built-in INFO command. This function will show the percentage of A: which has been used and how much is still free.
When you use the normal SAVE command on the top level menu of your Organiser you can only save 16 lines of text at once, and those 16 lines must contain less than 254 characters all told.
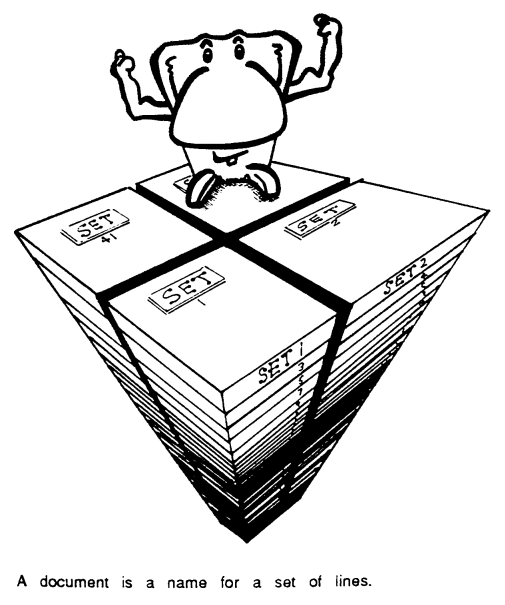
AutoScribe Plus on the other hand, can store a lot more lines at once. All the lines you write at one time are called a document. A document can have only one line in it or several hundred lines, although very long documents slow AutoScribe Plus down considerably.
By calling this set of lines a document, we are not saying that you have to use it solely for literary works. A document can contain anything which can be represented by the characters available on the Organiser.
We had to call a set of lines something which sounded more gracious, so we called it a document.
One document may contain a letter. Another on the same Datapak may contain a list of things to do, or a list of readings taken from a from a site visit or a list of scientific formulae.
When you use SAVE, your fixed 16 lines of text are put into the general bullpen area of the pack you use. That particular chunk of text is not given its own name.
When you create a document with AutoScribe Plus, that document is then given a unique name and stored in its own file in the pack chosen. A letter saved on B: might be called B:LETTR. A list of readings might be called BREADS. The choice of name is up to you.
In the analogy of the filing cabinet, each document created by AutoScribe Plus is given its own folder in the drawer chosen, away from the general bull-pen. Text created by AutoScribe Plus is special - it gets its own folder and each folder has to have its own name.
If you create a document then forget what it is called, AutoScribe Plus has a directory function which will list all the documents on each pack until you see the one you want. This feature is described on page 32.
Suppose that you write an AutoScribe Plus document which contains the word "President" several times and you call that document B:TEXT. If you then use the FIND command from the Organiser top level menu you will not be able to look up your text by entering FIND B:PRESIDENT. The Organiser top level FIND command only looks in the general bullpen area of B:. Your text is stored in a special named document. To look at it again, you need to enter AutoScribe Plus, say that you want to look at document B:TEXT, and then you can search within B:TEXT for the word "President".
Documents can be stored in A: or on a Rampak or Datapak in B: or C:. The maximum size of document is limited only by memory available on the pack you use to store it.
You can save up to 110 different documents on the same Rampak or Datapak.
If you store your document in A: you will reduce the amount of space left for the program to run. On Organiser models with 32 K Bytes or more of RAM, this will probably not matter, but on a CM version, with only 8 K Bytes of RAM, you may need to store your document on packs B: or C:, where the space taken by the document will not reduce the space available for the program to run.
The Organiser CM model has only 8 K Bytes of in-built RAM. If you use a CM with a Comms Link, under 4 K Bytes are left. (The Comms Link uses space in the in-built RAM).
You can print documents with the Comms Link attached to a CM, but you will not be able to use the editor properly with the Comms Link attached.
If you want to use the editor to its full, you will have to quit and remove the Comms Link. But you cannot just pull the Comms Link out while AutoScribe Plus is running. You have to quit AutoScribe Plus, turn your Organiser off, take out the Comms Link, then turn on again.
The Psion Organiser II can store information on two different types of storage media. Pack A:, which is built in to every Organiser, and Rampaks use RAM storage chips. Datapaks use EPROM storage.
On the outside a Rampak looks identical to a Datapak, but the different types of storage have different advantages. RAM is quicker and re-usable, whereas EPROM is more durable, lasts longer and, at the time of writing, is cheaper.
If you have used both kinds of packs, you will know that it is quicker to find or save information to RAM storage.
When you delete some information from RAM, the space that the information used can then be reused to save other data. This does not happen on a Datapak. Using a Datapak is like writing on a piece of paper in ink. You can cross out what you have done, but you cannot re-use the space on which you have written. The only way to re-use space on a Datapak is to format the whole pack using a formatter.
You can copy AutoScribe Plus documents from one pack to another.
For example, if you have an Organiser with sufficient RAM, you may find it convenient to compose a document in A:.
When you have finished the document you may then want to save a permanent copy on pack B:.
The most convenient way to copy document from pack to pack is to use FileMaster, another Widget Software package for the Psion Organiser II. If you do not own a copy of FileMaster, you can use the file COPY command which is built in to every Organiser.
In order to identify which files are AutoScribe Plus documents, AutoScribe Plus always adds the digit '8' to the end of a document name. So if you call your document A:NOVEL, AutoScribe Plus will store is as A:NOVEL8.
If you use FileMaster you will be able to look through the list of files on each Datapak. All the names which end in the digit 8 will be AutoScribe Plus documents. The FileMaster copy command can copy an AutoScribe Plus document in exactly the same way it handles any other file.
To copy a document called A:NOVEL without FileMaster, you need to leave AutoScribe Plus and press [ON/CLEAR] until you are at the top level menu of your Organiser - the one which usually starts FIND SAVE DIARY etc.
Press [C] until you are on top of the COPY option. Press [EXE]. The Organiser screen should show the word FROM. Type in A:NOVEL8 including the first A, the colon (:) - a full stop or a semi-colon will not do - and the last 8. Press [EXE].
Next, the word TO should appear on the second line. Type in B:.
FROM A:NOVEL8 TO B:
When you press [EXE], the document will be copied across to pack B:. If you have made a mistake in typing the name in, the Organiser may reply "FILE NOT FOUND". If you get the message "BAD FILE NAME", check that you are entering the pack letter and the colon correctly.
Having copied the document to another pack, you may no longer want the original version in A:. You can delete A:NOVEL using the delete command on the document menu of AutoScribe Plus as described on page 34.
Unlike many other software manufacturers we allow our customers to copy the program they have paid to use onto the pack which they prefer to use it on. You do not have to have the original green AutoScribe Plus pack in the Organiser in order to work AutoScribe Plus.
Our policies make life easier for you, the customer. We trust that you will make life easier for us by respecting our copyright on the software in this pack. Copies of AutoScribe Plus must only be made for your own use, not that of anyone else. Companies should purchase one copy of AutoScribe Plus for each Organiser on which the software is to be used.
In some countries of the world, where our chances of pursuing transgressors are slim, we have had to install copy protection on the original green pack. In these countries, please ignore the following section.
Suppose you have the original AutoScribe Plus pack in B: and a larger Datapak which you always keep in your Organiser in C:. To copy AutoScribe Plus onto the second pack, first go to the Organiser's top level menu, which you usually see when you first turn on.
Select PROG from the top level menu. On the Psion Organiser II CM and XP versions, the screen should show the PROG menu on the screen, illustrated below.
If your screen does not look like this, start again and make sure you select the PROG option.
EDIT LIST DIR
NEW RUN ERASE
The PROG menu
From the PROG menu, press [C] for COPY and reply [Y] to the question OBJECT ONLY Y/N.
If AutoScribe Plus is on B:, copy FROM B: (press [EXE] after entering the colon) TO C: (again press [EXE] after entering the colon).
The pack you copy AutoScribe Plus onto will not be able to install CUT (see chapter 7) or automatically install the letters WP on the top level menu, but in all other respects it will be able to run AutoScribe Plus.
To be able to use the AutoScribe Plus, you must put the letters WP on the Organiser's top level menu.
WP was chosen as the menu entry because it is short, has a unique initial letter, and is short for Word Processor.
Make sure that the Organiser is switched off and push the original AutoScribe Plus pack into a free slot in the side of the machine.
Turn the Organiser on and press [ON/CLEAR] twice. The letters WP should appear on the screen as the fifth item on your top level menu. This will only work with the pack on which AutoScribe Plus was originally supplied to you.
To start AutoScribe Plus, press the W key or place the cursor on WP and press [EXE]. A title screen will appear typing any key will clear this.
When you run AutoScribe Plus, it assumes that you want to start writing a document straight away. It asks you what the document you want to write is called. Document names can be up to 7 characters long.
If the document which you say you want to work on exists already, it will be opened and you can get right on and edit it. If the document which you say you want does not yet exist, AutoScribe will assume that you want to start a totally new document and create it.
If you do not want to start work on a document immediately (for example, you may want to look at the directory of documents which have already been started) press [EXE] or [ON/CLEAR] instead of entering a document name and you will go direct to the document menu, which is described in chapter 6.
Your bank manager has been bringing some unwelcome facts about your account to your notice. You want to write a letter to him, called BANKMGR, which you will store on main RAM of your Organiser, pack A:, while you write it.
Run WP from the top level menu. AutoScribe Plus asks you for your document name. Press the [MODE] key until A: appears on the left hand side of the screen, then type in the letters B A N K M G and R until the screen appears as follows:
Document Name A:BANKMGR
Since A:BANKMGR is a new Document name, AutoScribe will ask how many characters long each line should be. The line length must be between 1 and 240. Typewritten letters on the European standard A4 paper usually use in the region of 60 characters per line.
You then go directly into the AutoScribe Plus editor described in chapter 4.
There are three main areas on AutoScribe's mental map. They are
The map shows you how to move between these different parts of AutoScribe Plus.
When you first enter AutoScribe Plus, for example, you are asked to enter a document name. If you do enter a name, you go directly into the editing area. If you do not enter a name, you go to the document menu.
FIND SAVE DIARY CALC PROG WP WP starts AutoScribe Plus | v Document Name: ------>--------------+ A: | | No name (EXE) /--Edit List Newdoc | goes to doc menu / DEL Screen | / Replace Print v / Transmit Receive |----<------------/ | Document Menu | TOP CONT BOTTOM | v | CAP Line 1:1 Twenty-seven yea ---<--->--- Type Char Lineln Goto DelLine The Editor CentLine ä ß ... Off [MODE] goes to [MODE] menu [ON/CLEAR] to document menu [MODE] Menu A third [MODE] or [ON/CLEAR] goes back to editor
Figure 1. The AutoScribe Plus Map.
This chapter describes the standard editing features of AutoScribe Plus. The next chapter describes the extra editing facilities which the [MODE] key leads you to.
If you are familiar with word processing on other computers, you should find entering and editing a document in AutoScribe quite straight forward, despite the limitations of the display. If you have never used a word processor before however, don't panic! It is not that difficult to master and a few practice sessions should give you enough confidence to develop your next novel on the Organiser.
One important point to remember is every line you type is always saved. Word processors on other computers usually require you to save your document before quitting the program. AutoScribe is not like that. AutoScribe Plus always saves the text you have written. You cannot lose any text by pressing the [ON/CLEAR] key.
You can also 'type ahead' of the Organiser. By this I mean that, if AutoScribe Plus is performing a task that takes some time (e.g. formatting some lines, moving a long way in the text), you can safely carry on typing, even though the characters do not appear on the screen immediately. Nothing will be lost until you hear the BEEP which signifies that the keyboard buffer is full.
Before you start, it is important to know how you can get out of the AutoScribe Plus editor.
To finish editing AutoScribe Plus, press [ON/CLEAR]. You will then be at the document menu described in chapter 6. Press [ON/CLEAR] again and you will leave AutoScribe Plus altogether.
Suppose you decide that the first sentence of your next novel is to be:-
Twenty-two years before, when Rufus Lyon was no more than thirty six years old, he was the admired pastor of a large Independent congregation in one of our southern seaport towns.
Start AutoScribe Plus by selecting WP from the Organiser's top level menu. When AutoScribe Plus asks for the document name, enter A:NOVEL and press [EXE].
Unless you have already started another document called A:NOVEL, AutoScribe Plus will announce that it is creating A:NOVEL and suggest 60 characters as an appropriate line length. For the purposes of this example, change that line length to 40, by typing 40 then pressing [EXE].
The bottom line of the screen (which is where you type your text) will be empty. The top line is called the Status Line.
Status line the top line of the display will show, on the left:
CAP if you have CAPs locked on
NUM if you have NUMs locked on
N + C if your NUMs and CAPs are locked on
MOD if you have typed the [MODE] key (see 'extra facilities')
The rest of the line shows the current line number and the character position on that line. When you start a new document, you should be on position 1 of line 1.
Before typing in the example sentence, most of which will be in lower case letters, first make sure that the CAPs lock and NUM lock are off.
If the word CAP is on the left hand side of the status line, press [SHIFT] and [UP ARROW] to turn it off. If NUM is in the top left hand corner of the screen, press [SHIFT] + [DOWN ARROW] to clear it. If N+C shows on the status line, press [SHIFT] + [UP ARROW] followed by [SHIFT] + [DOWN ARROW].
To start your novel with a capital letter, press the [MODE] key, at which the Organiser will beep. Take your finger off the [MODE] key then press [T]. A capital T should appear on the screen and the status line now shows that you are on position 2 of line 1.
Continue typing by pressing [W], then [E] then [N] etc. If you have CAPS lock off, the second and subsequent characters should appear in as lower case letters. The hyphen is the minus sign, which you get by pressing [SHIFT] and [R] at the same time, and the comma is [SHIFT] + [M].
To enter the sentence above, you will also need to use the [SPACE] key. To get a single capital letter at the beginning of a name press [MODE] followed by the letter you want in upper case. This ability to switch a single letter into capitals is one of the features on the [MODE] menu which is described in the next chapter.
If you have entered the sentence exactly as shown above, when you come to the end of the name Lyon, the status line will show that the cursor is on the 41st character of the first line. As we set the line length to 40 characters, we have come to the end of the first line.
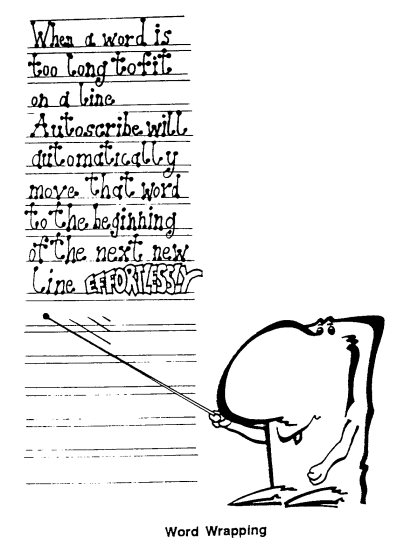
AutoScribe Plus does not stop or pause. The next character you type - which in the example above would be a space - moves you on to the first position of the second line. You can continue typing in 'was no more than thirty six years old... etc' without having to work out where your first line should end.
The second line should end half way through the word he. The h in he is the 40th character on the second line. When you type in the single letter h, it is put on the end of the second line. But when you add the e, the word he becomes too long to fit on the line. Instead of chopping the word in half to fit the line length, AutoScribe Plus intelligently moves the whole word on to the next line.
Of course, everyone makes mistakes. While you are in the editing part of AutoScribe Plus you can always go back and correct what you have written.
Cursor movement - to move around the text use the arrow keys:
[UP] - move up one line (until top of text)
[DOWN] - move down one line (until bottom of text)
[LEFT] - move one character to the left.
[RIGHT] - move one character to the right.
It is possible, often preferable, to move through the text at a faster pace by using the [SHIFT] key as well:
[SHIFT] and [LEFT] move one word left
[SHIFT] and [RIGHT] move one word right.
If you know that you want to go directly to line 7, for instance, press [MODE], then [RIGHT] and AutoScribe Plus will ask you which line you want to go to. Type in the number of the line you want to go to, then press [EXE]. This is one of the extra features described in full in the next chapter.
[DEL] deletes one character to the left of the cursor. [SHIFT] and [DEL] delete the character at the cursor. To delete a line, press [MODE], release [MODE] then press [SHIFT] and [DEL] together. This is one of the features of the [MODE] menu described in the next chapters.
If you press [DEL] when the cursor is on the first character of a line, AutoScribe will pull up the text on the line to join the end of the line before.
Suppose your line length is 30 characters and the first two lines of your document read
The rain is Spain
falls mainly on the plain
If you place the cursor on the f of falls and press [DEL], AutoScribe will try to join the two lines together as
The rain in Spain falls mainly on the plain
But this would make the line longer than 30 characters, so it leaves the lines as
The rain in Spain falls mainly
on the plain
Unlike a typewriter, you do not usually need to press a carriage return key to go onto a new line with a word processor. If you reach the end of a line, AutoScribe will automatically move you on to the next line.
Sometimes, however, you may want to stop a line short, or introduce a blank line to make your text look more attractive on the page. Pressing [EXE] will finish the current line and force you on to the next line.
If the cursor is at the end of a line, a new line is created and the cursor moved to the beginning of it. This will usually be used to signify the end of paragraphs, but can be used to insert lines anywhere.
If the cursor is in the middle of a line, the text from the cursor to the end of the line is moved down to the new line.
For example, cursor is on the f of falls in the line
The rain in Spain falls mainly
pressing [EXE] will move falls mainly onto the next line.
If you press the [MODE] key when you are in the editor, the word MOD appears on the top left of the screen.
MOD line 1:1 Twenty seven yea
If you press [MODE] twice, you come to the menu of extra features.
If you press [MODE] three times, you come back to the editor, with no harm done to your document. Pressing [ON/CLEAR] while MOD is on the top line also takes you back to editing.
There also short cuts to using these extra features. While you are learning how to use AutoScribe Plus, you will probably find it easier to use these features by pressing [MODE] twice then scrolling round the menu until you find the entry you want. When you become familiar with AutoScribe Plus, you can use these features by pressing [MODE] only once, followed by a short cut key.
Press [MODE], release the key then press [SPACE] and the current line will automatically be centred. This could also be done by pressing [MODE] twice, then selecting CentLine from the menu.
Press [MODE] then [/] (which is [SHIFT] + [F]) and a conventional divided by sign will appear on the screen. This could also be done by pressing [MODE] twice, then selecting the divided by sign from the list of characters in the second half of the [MODE] menu.
If you want to type a whole sentence in capitals, it is best to do this by turning the CAPs lock on by pressing [SHIFT] and [UP ARROW] at the same time.
But if you are typing a document which is mostly in lower case letters, turning the CAPs lock on and off for single capitals will hinder your typing progress.
One of the simplest and most useful features of the editor is that if you press [MODE] followed by one lower case letter, that letter will change into upper case. This is useful for names which begin with a capital or for the first word of a sentence.
There are a lot of characters which the Organiser can show on the screen but which are not on the keyboard. The question mark (?) and exclamation mark or shriek (!) are two such characters.
Any character which the Organiser can display can be used in AutoScribe Plus documents. Many characters can be produced by pressing [MODE] then a certain key.
For example, [MODE] then [6] (which is [SHIFT]+[Q]) produces ? and [MODE] then [-] produces !.
Both ? and ! can also be found on the [MODE] menu, so if you cannot remember which key produces ? directly you could press [MODE] twice then move around the menu until you reach the ? sign.
The table on page 40 shows how you can get special characters by pressing [MODE] then [SHIFT] plus another character.
If you have problems making these characters appear on your printer, you may find that you need to tell AutoScribe Plus which type of printer you are using. See Page 40.
Prt Char Goto
Linelen DelLine
CentLine ä ß ...
Off
[MODE] Menu
You reach this menu by pressing [MODE] twice from the editor. There are also short cuts to each item on this menu by pressing [MODE] then another key.
allows you to insert codes to underline text, to put text in bold or italics or condensed type.
b+ b- u+ u- i+
i- c+ c-
Typefaces Menu
| b+ | bold on |
| b- | bold off |
| U+ | underline on |
| U- | underline off |
| i+ i- | italics on, off |
| C+ C- | condensed on, off |
Choosing Type from the [MODE] menu, leads to the menu of typefaces available.
To start text in bold type, choose b+ from the Typeface menu. You will return to the editor, with an additional special character shown on the screen.
Since bold type (and the other typefaces) cannot be shown on the screen of the Organiser, we have used some special characters to show where bold (or the other typefaces) begin and end.
You can delete the typeface on and typeface off characters in the same way as you can delete normal characters.
If you select bold on, everything you type until you enter a bold off character will be printed in bold type. If you select bold on and forget to set bold off, everything in the rest of your document will be printed in bold type.
Additional typefaces will only be shown on paper if you tell AutoScribe Plus the type of printer you are using, as described on page 22.
Characters which are not on the [MODE] menu can be produced by the Char option. This is an advanced topic, suitable for users with some computer knowledge. It is described in appendix 1.
Shows current line length, which can be altered. If made shorter, the entire document is reformatted. If you have a long document this can take a while as every line may have to be rewritten. R the length is kept the same or increased, no reformatting takes place.
Allows you to go directly to a given line. For example, if you want to skip to line 15, select Goto, then enter 15 when you are asked for the line number, then press [EXE] AutoScribe will then jump directly to the beginning of line 15.
deletes current line
centres current line
If you select one of these special characters from this menu, the character will appear in your document. These characters will only appear on paper if you set the type of printer you are using, as described on page 40.
Sometimes, you may want to turn off your Organiser while you are in the middle of editing a document. If you select this option, the Organiser will turn off in the usual way. When you turn on again, you will be in exactly the same place you left off, ready to start editing again immediately.
| [ON] [MODE] [↑] [↓] [←] [→] Menu Type Char Lineln GOTO SH ä ß [ ] ^ ÷ [A] [B] [C] [D] [E] [F] A B C D E F SH _ ' { } | £ [G] [H] [I] [J] [K] [L] G H I J K L SH ` # ö π ? ! [M] [N] [O] [P] [Q] [R] M N O P Q R SH @ & ü ¢ α √ [S] [T] [U] [V] [W] [X] S T U V W X SH DelLine ¥ Ω [SH] [DEL] [Y] [Z] [SP] [EXE] Y Z CentLine |
Figure 2: Keyboard action after [MODE]
[MODE] then [A] = A.
[MODE] then [SHIFT] + [A] = ä.
There are two menus of features in AutoScribe Plus. There is the menu of extra editing features which you get to by pressing [MODE] twice when you are in the middle of editing a document and there is the document menu.
You got to the document menu in two different ways
i) if you press [ON/CLEAR] when you are editing a document
ii) if you press [EXE] without entering a document name when AutoScribe Plus asks you to give one.
The document menu has all the functions needed to start a new document, to delete an old one or to print a document or transfer a document to another word processor on another computer. The functions to search and replace text are also on the document menu.
If you are editing a document called A:LETTER the visible part of the document menu looks like this:
Edit_A:LETTER List Newdoc DEL
Naturally enough, this option puts you back into the AutoScribe Plus editor. If you have been editing a document, the document name will be shown on the menu, next to the word edit.
This option is useful if you have just popped out of the editor to perform a search or to print the current document and want to go back into the same document.
This option lists the directory, that is the names of the documents you have started already. It is useful if you cannot remember what you called a document.
Suppose that you have two documents saved on drive C, called C:FELIX and C:ELIOT.
From the document menu, choose List. AutoScribe Plus asks you whether you want to look at the documents on A:, B: or C:. Choose C: by pressing the [C] key.
The first document name will appear on the top line of the screen. Press [EXE] or [C] again and the next document name will appear on the bottom line of the screen. In this case, the second document would be C:ELIOT.
Pressing [ON/CLEAR] will take you back to the document menu.
If there were no AutoScribe Plus documents on drive C:, List will show the message END OF PACK. This does not mean that C: is totally empty - it might contain a large file saved with the Organiser's SAVE function or created with a program such as Widget Software's FileMaster.
But List only looks for AutoScribe Plus documents. You cannot use AutoScribe Plus on files which are not AutoScribe Plus documents. If you want to turn a file created with FileMaster or another file creation program into an AutoScribe document, you must use the translate utility described in the appendices.
Now, suppose you want to start editing the document C:ELIOT again. You could press [ON/CLEAR] to go back to the document menu, then choose Newdoc, then type in C:ELIOT.
But when List has displayed a name on the screen, you can skip all that work and go directly into that document by pressing [SPACE].
Pressing [MODE] is another short cut. It takes you back to the document menu, but the last document displayed by List becomes the current document to edit.
Pressing [DEL] will delete the last document displayed - but not until after you have been asked if you are sure.
Suppose you want to read through your letter to the bank manager on A:, but you cannot remember what you called the bank manager letter.
If you are in the editor, get out to the document menu by pressing [ON/CLEAR]. Once you are at the document menu, choose List on drive A:. Press [EXE] until the name of the letter appears on the bottom line of the screen.
Press [MODE]. You should now be at the document menu, but with the bank manager letter listed as the current document. Now you can use the Search command to read through the letter, line by line.
Switches you to editing another document. You leave the document you have been working on (which, like all documents in AutoScribe Plus is automatically saved) and you can switch either to a document which you have created at another time or start a totally new document from scratch.
As ever, AutoScribe Plus will ask for the name of the document you want to switch to.
For example, suppose are in the middle of editing C:NOVEL but you have to stop work on your novel and finish your letter to the bank manager, A:BANKMGR.
You leave the AutoScribe Plus Editor by pressing [ON/CLEAR]. You will then be at the document menu, with Edit_C:NOVEL as the first option. Choose Newdoc, and enter document name A:BANKMGR.
If the letter A:BANKMGR already exists, you will be asked whether you want to start at the top of the letter, at the bottom, or continue where you last left off.
On the document menu, DEL deletes a whole document. If you select DEL, AutoScribe Plus will first of all ask you to confirm that you really do mean it. Press [Y] to confirm or, if you selected DEL by mistake, and do not want to delete the document, pressing [N] or [ON/CLEAR] will return you to the document menu without any damage being done.
If you confirm that you do want to delete the document, you then have one second in which to change your mind before the deed is done. If you do suddenly realise that you have made a mistake, you must press [ON/CLEAR] quickly. When the beep sounds, it is too late.
To find a word, and this can be any string of characters and does not have to be a complete word, choose Search from the document menu. AutoScribe Plus will then ask for the 'Search string?' and you should type in your word followed by [EXE].
If the string is found, the status line will show which line it is on and the position within the line, and the line itself will scroll on the bottom of the display. The string will be highlighted by underscores.
Pressing any key except [ON/CLEAR] will stop the display and a menu will be shown:
NEXT EDIT STOP
| NEXT | AutoScribe will search for the next occurrence of the string. |
| EDIT | you go into the document at that point and can edit freely until you press [ON/CLR] |
| STOP | go back to the document menu |
1. Viewing the whole document
If you use the main Organiser FIND function (the one you see on the screen when you first turn an Organiser on), and press [EXE] without giving a search clue, the Organiser will list every record in the main file.
Similarly, if you use Search on the document menu and press [EXE] without entering a word to search for, AutoScribe Plus will list every line in the document you have written.
This is a good way to scroll through a document you have written line by line to review its entire contents.
2. Searching backwards
If you press [UP ARROW] when the Search function has found something, Search will then start searching backwards in the document.
In the example sentence on page 12, the word 'the' appears twice, at line 3 character 5 and line 5 character 4.
If you search for 'the' in this sentence, AutoScribe Plus will show it on line 3. Press [EXE] then select NEXT, and AutoScribe Plus will Search the second time it appears on line 5. Now if you press the [UP ARROW] key, AutoScribe Plus will search backwards and find the original appearance on line 3.
Pressing [UP ARROW] will not find words which occur earlier on that same line, only words which occur on previous lines.
Replace is similar to Search in that it searches for a word or part word, but when it finds it, it can automatically replace it with another word or phrase.
If you just want to delete every occurrence of a word, you can replace it with nothing by pressing [EXE] when AutoScribe Plus asks what you for the replacement word.
Unlike Search, Replace cannot go backwards and cannot be used to scroll through a whole document.
When AutoScribe Plus finds the word it is looking for pressing any key will produce the menu
REPLACE NEXT STOP
| REPLACE | will substitute the word you were searching for with the replacement word you entered, then go on to look for the next occurrence of the first word. |
| NEXT | searches for the next occurrence without replacing the existing one |
| STOP | returns you to the document menu |
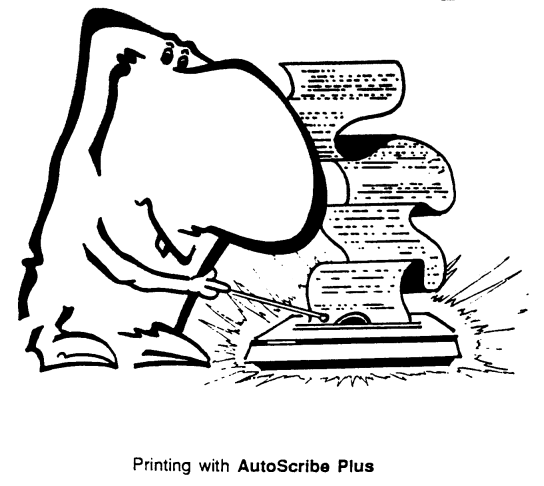
The Print option can send your document to any printer which works with the Psion Organiser II, or to any other computer which can receive text from the Organiser.
Unless you are using the special Psion printer which plugs directly into the top of the Organiser, you need to use a Comms Link to take the information from your Organiser to the printer or other computer. You must set up the baud rate, the handshaking and all the other communications parameters before you can print anything. AutoScribe Plus uses the software in the Comms Link to send information to a printer. If the Comms Link software is not set correctly, AutoScribe Plus cannot print.
If you are having problems printing, consult the Comms Link manual first of all. Widget Software produces an information sheet describing how to link the Psion Organiser II to a variety of popular printers and computers. If your printer is not listed here, contact either your national Psion distributor or the manufacturer of the printer or computer.
If you want to transmit or receive documents to and from a computer which can run Psion's CL program which comes on a disk with the Comms Link, use either the TRANSMIT or RECEIVE options instead of Print. At the time of writing, Psion produces a version of the CL program for the IBM PC and compatible computers and for the Apple Mac.
If you have another computer already hooked up to a printer, you may want to transmit your document to that computer, store your document temporarily on that computer, then print it using the cabling you already have connected. You will need to use several software packages and commands on the other computer to do this, and these are beyond the scope of this manual.
Choosing PRINT from the document menu leads to the smaller print menu.
PRINT MARGIN
EPSON PSION IBM
The PRINT menu
Next, you are asked to set the page length. This is the number of lines which will be printed on one page. If you do not want to set a page length, enter zero here and AutoScribe Plus will print out all the text in your document continuously without gaps. Setting page length, however, improves the appearance of long documents.
If you do set a page length, you are then asked to enter a margin for the top and the bottom of the page. For example, if you set a page length of 70 lines with a top margin of 4 lines and a bottom margin of 2 lines, AutoScribe Plus will print 4 blank lines, followed by 64 lines of text followed by 2 blank lines on each page.
While you are entering these settings you can press [UP] to go back to the previous one.
These options tell AutoScribe Plus what kind of printer you are using. If you do not set the printer type, AutoScribe Plus will assume that you are using an Epson printer.
Psion refers to the Psion printer. IBM refers to any printer made by IBM. Many other printers are made to be compatible either with Epson printers or IBM printers.
If your printer is not on the list of printers above, read your printer manual to see if it has any reference to being Epson compatible or has an 'IBM-emulation mode'.
If you are familiar with printers and writing OPL, you can write your own printer driver, as described in the appendix on special characters.
Transmit and Receive will send or receive a document to or from a computer which can run the CL program provided with the Psion Comms Link. At the time of writing CL is only available for the IBM PC and compatible computers and the Apple Mac. If you want to transmit to a computer which cannot run CL, you need run some other communication program on it and use the Print command to send the document across.
For Receive, AutoScribe Plus first asks what the document to be received should be called on the Organiser. If you give the name of a document which already exists, AutoScribe Plus will ask if you want to replace that document. If you receive a document called A:LETTER, the new text received will overwrite any previous document called A:LETTER.
For Transmit, it is assumed that you want to transmit the document which you have last been editing, the one shown on the document menu. If there doubt over what document to use, AutoScribe Plus will ask you for the relevant document name.
For both Transmit and Receive, AutoScribe Plus then tells you to "Run CL or press [ON/CLEAR]", then asks you for the name of the file on the other computer.
If you entered Transmit or Receive by mistake, press [ON/CLEAR] to get back to the document menu. Otherwise enter the file name as requested, then press [EXE].
If you are transmitting, you can choose what the document is going to be called on the other computer. The file name does not have to be the same as the document name used on the Organiser.
For example, you might have started a letter just called A:LETTER on AutoScribe Plus, but when you transmit it to a PC (where you might have stored several hundred letters to different people) you may prefer to give it a more descriptive name. So you choose Transmit, and when asked for the filename on the other computer, enter BANKMGR.TXT.
If you are receiving, you have to type in the name of the file you want to fetch. Imagine that you had a room lined with shelves on all sides. On every shelf there are jars of jams, preserves and jollies, all labelled. If you were sending someone into that room to fetch a pot of jam, you would have to tell them whether you wanted strawberry jam or raspberry or blueberry and whether the strawberry jams were stored on the right hand shelves or the left. Similarly, if you are sending AutoScribe Plus to look for a file on your computer, you have to tell it what the file it is looking for is called, and also in what directory or folder it is stored.
When you have entered the file name for the other computer, AutoScribe Plus will transmit or receive the document. You should see the words "Running FILE server" or a similar message appear on the screen of the other computer. When the transmission is over, these words will disappear from the screen of the other computer and AutoScribe Plus will go back to the document menu.
If AutoScribe Plus gives you the message "Comms Link not connected" and you are sure that your Comms Link is connected to the top of the Organiser, leave AutoScribe Plus for a moment, go back to the Organiser's top level menu (the one that usually begins FIND SAVE etc) and press the [ON/CLEAR] key a couple of times. Nothing visible will happen, but you should find that this action wakes the Organiser up to the fact that a Comms Link is present, and when you go back to Transmit or Receive, the Organiser will acknowledge the presence of your Comms Link.
Text which is written in an AutoScribe Plus document is kept in a special format. It is kept separately from text which you might have saved using another option on the top level menu of the Organiser.
CUT allows you to fetch and carry text between AutoScribe Plus and other programs. For instance, if you use FIND on the top level menu to find an address, you can fetch that address into CUT, go into AutoScribe Plus and place the address at the top of a document.
CUT is a separate part of AutoScribe Plus. It is not on any of the menus in AutoScribe Plus itself. You install CUT separately and run it by pressing special key combinations.
To install CUT, put the ORIGINAL green AutoScribe Plus program pack in the back of your Organiser, in either slot. Press [ON/CLEAR] twice and CUT will automatically appear on the top level menu, in the second to fast position.
If you choose CUT from the top level menu, the message "CUT code installed" appears, then you return to the menu. The CUT code is now installed in the built-in RAM of your Organiser, waiting for you to use h.
CUT is an example of a memory resident program, sometimes called Terminate and Stay Resident (TSR) programs. Running the word CUT from the top level menu does not have the same effect as running a normal menu option.
If you run the DIARY from the top level menu, the Organiser immediately starts to show you the contents of the diary. If you run WP from the top level menu, the Organiser immediately starts running AutoScribe Plus. But if you choose CUT, the CUT code simply loads and unloads itself. CUT does not really start to do its job until you press [SHIFT] and [SPACE] or [SHIFT] and [EXE].
If the CUT code is already installed in your Organiser, running the word CUT removes the cut code from the in-built RAM. The message "CUT code removed" appears on the screen.
Because CUT is a special type of program, it can only be installed and un- installed from the original AutoScribe Plus pack. You can copy the rest of AutoScribe Plus onto another pack, but you cannot copy CUT. But this does not hinder your use of your Organiser. Once you have installed CUT, you can remove the original pack, and the running part of CUT will still work.
You can use all the normal features of your Organiser while CUT is resident. Most of the time it just sits there. Like the Comms Link, it uses up some space in the Organiser's in-built RAM memory, but otherwise the Organiser works as normal.
So far, you might be wondering whether CUT does anything. There are three key combinations which make it spring to life.
Move onto a blank line of an AutoScribe Plus document. Type the letters abc, so that they are the first three letters of a new line. Press [SHIFT] and [SPACE] at the same time. You should hear a low buzz in response. Nothing visible happens to the screen display, but the buzz means that CUT has fetched the characters displayed on the screen into its own storage area.
Now press [SHIFT] and [EXE] at the same time. The low buzz should sound again. This time something should happen on the screen. [SHIFT] and [EXE] produce an action replay effect. The three letters abc are replayed onto the screen so that the line now reads abcabc.
You can repeat the process to fetch and repeat the process with the six characters not on the screen. Press [SHIFT] and [SPACE] again to fetch the six characters on the screen into CUT. Move to a new line of your document and press [SHIFT] and [EXE]. The letters abcabc should be replayed onto the new line.
Remember that CUT will only work if the CUT code is currently installed. If you have removed the CUT code from memory or have not installed the CUT code in the first place, no buzz will sound and [SHIFT] + [SPACE] will have the same effect as a normal [SPACE]. If the buzz does not sound, quit AutoScribe Plus and go back to the top level menu to install CUT.
The ability to copy lines of text from place to place is called Cut and Paste by most word processors, a legacy of the days when it was necessary to use scissors to move text from one part of a typewritten page to another. The words copy and replay are a more accurate description of what this program actually does, but we have called it CUT to be traditional.
If you experiment you will find that [SHIFT] + [SPACE] will fetch all 16 characters on the current line of the screen. Up to 16 groups of 16 characters can be fetched at one time.
CUT takes characters direct from the screen. If the current line is longer than 16 characters, CUT will take the characters that you can see on the screen.
[SHIFT] + [EXE] replays a group of 16 characters. The first group you fetch with [SHIFT] and [SPACE] will be the first group replayed by [SHIFT] and [EXE].
[SHIFT] + [MODE] clears out all groups of characters held by CUT. If you have pressed [SHIFT] and [SPACE] by mistake, [SHIFT] + [MODE] will remove all lines hold by CUT and allow you to start afresh.
The real strength of CUT is that it can work outside AutoScribe Plus. If you have the CUT code loaded, you can press [SHIFT] and [SPACE] to fetch text while you are in the FIND, in the DIARY or in parts of Widget Software's FileMaster.
For instance, suppose you use the top level FIND function to find a name and address which appears on the screen as
51st St Software,
512 Main St
BRISTOL
Press [SHIFT] and [SPACE] while the cursor is on the top line. Move to the second line and press [SHIFT] and [SPACE] again. Repeat the process on the third line. Now you have the entire address loaded into CUT,
Now go back into AutoScribe Plus by running WP from the top level menu, start a now document. Press [SHIFT] and [EXE] on the first line of the now document and the first line of the address will appear. Press [EXE] on its own to start a new second line of the document. [SHIFT] and [EXE] will now replay the second line of the address. Similarly the third line of the address can be replayed onto the third line of the document.
CUT provides an easy way of moving an address, or diary information or any other kind of text into an AutoScribe Plus document. If the lines you want to move are longer than 16 characters, it is more difficult to move exactly the text you want. If the line you want to copy is scrolling, it is best to stop the screen scrolling by pressing the [LEFT] arrow key before pressing [SHIFT] and [SPACE].
CUT can also be used to pick up text from an AutoScribe Plus document, then to save it to a pack, using either the SAVE option on the Organiser's top level menu or the Save or Edit functions in FileMaster.
CUT has only been tested to work with AutoScribe Plus. FileMaster and the Organiser's own FIND, SAVE and DIARY functions. It may also work with other programs available for the Psion Organiser II but the results cannot be guaranteed. You cannot harm your Organiser by experimenting, but if things go wrong you may lose all the information stored on drive A: or in the diary.
There are other memory resident programs available for the Organiser but we recommend that you do not run two different memory resident programs in your Organiser at the same time.
In the back of the Psion Organiser II manual is a complete table of the characters which the machine can use. Any character in this table can be produced on the screen of the Organiser by selecting the Char option from the [MODE] menu and then type in its character (or ASCII) number.
Unfortunately, working out a character number from this table is not easy for the inexperienced computer user.
For example, the Greek letter theta is in the right hand column of the table. Its column heading is 1111 in binary. The row heading is 0010. So the character number for theta is 11110010 in binary, which is 242 in decimal.
Entering 242 when the Char option asks for Character number will produce theta on the screen.
In addition to the printer drivers described on 40, you can set the printer to use the printer driver contained in the OPL procedure USER$.
Unlike all the other OPIL procedures on the green AutoScribe pack, you can look at and, if you have copies AutoScribe Plus onto another pack, change the source code of USER$.
USER$ returns a translation string, consisting of up to 20 characters to translate. One character on the Organiser can be translated to become any number of characters on the printer. The string returned by USER$ specifies which characters are translated.
The syntax of the string returned must be
"CLXXXCLXX..."
where C is an Organiser character,
L is the length of the translated string, when L=CHR$(2), C
will be translated to the following two characters
XXX is the string to which C will be translated
Character $D0 (used for underline on in AutoScribe Plus) needs to be translated to the string ESC - CHR$(1) and character $D1 (underline off) needs to be translated to ESC - CHR$(0).
The following procedure returns these strings.
USER$: LOCAL x$(30) x$=CHR$($D0)+CHR$(3)+CHR$(27)+"-"+CHR$(1) x$=x$+CHR$($D1)+CHR$(3)+CHR$(27)+"-"+CHR$(0) RETURN x$
Characters used in AutoScribe Plus to represent print changes are
| Underline on | $D0 | Underline off | $D1 |
| Italics on | $D2 | Italics off | $D3 |
| Bold on | $D4 | Bold off | $D5 |
| Condensed on | $D6 | Condensed off | $D7 |
| Large text on | $D8 | Large off | $D9 |
If you use AutoScribe Plus with either a PC or an Apple Mac, you will be able to send your documents to and from word processors on your larger computer by using the Transmit and Receive options on the document menu.
At the time of writing, there are several popular types of computer, for example a BBC micro or a Commodore Amiga, which cannot run the CL program which allows direct transfers.
If you have one of these computers and a communications program to run on it, you can send AutoScribe Plus documents to your other computer using the Print command, but you cannot directly receive documents in return.
If you receive some text using the Receive option of the Comms Link menu (not the Receive option in AutoScribe Plus), you will need to convert this text to the format used by AutoScribe Plus before you can use AutoScribe Plus to edit it.
On the green AutoScribe Plus pack, there is a program called Convert which will make this conversion for you.
Convert asks you
When Convert has finished, the original text file will be left unaltered and the new, converted document will be ready to edit using AutoScribe Plus.
"CUT code installed" "CUT code removed" ASCII BBC micro CAP Capitals Single Capitals CentLine characters per line (2) (3) special (2) CM model Commodore Amiga Comms Link not connected Copy Protection Copying AutoScribe Plus Copying documents creating a new document Cursor movement CUT Delete character every occurrence of a word whole document DelLine Directory of files document copying creating a new one menu name (2) documents Storing Editor Emergency exit END OF PACK EPSON Error messages Comms Link not connected Exclamation mark (!) Getting out of the editor Goto line Keyboard buffer List files Map MARGIN memory RAMpacks and Datapaks required in RAM resident merge lines MOD MODE menu moving text with CUT New lines Newdoc - document menu NEXT EDIT STOP NUM OFF Print Printer User defined driver Pull up line Question mark (?) Quit editor Receive - document menu Replace REPLACE NEXT STOP RunCL or press [ON/CLEAR] Running FILE server Saving text Search - document menu Shriek (!) Special characters (2) Status line Transmit - document menu type ahead User defined printer drivers Viewing the whole document Word-wrap