Version 1.0 - July, 1989
Flightmaster, Inc.
Lake Technology Park
P.O. Box 128
McHenry, MD 21541
This document © 1989 Software 2000. Inc.
Flightmaster software © 1989 Software 2000. Inc.
FlightmasterTM is a trademark of Software 2000. Inc.
July 1989 Edition (Flightmaster Version 1.0).
Printed in U.S.A. by Community Press, Provo, Utah.
The Flightmaster software described in this document is protected by both the Copyright Act of the United States (Title 17. USC) and by international treaty provisions. Consequently, you must treat this software just like a book. This means that the software may be used by any number of people and may be freely moved from one location to another, so long as there is no possibility of it being used by two different people in two different places at the same time.
Flightmaster, Inc., Warrants the physical Flightmaster hardware and documentation to be free of defects in materials and workmanship for a period of one year from the date of purchase, and Warrants the Flightmaster software to operate substantially as described in this User's Guide.
In the event of notification within the warranty period of defects in material or workmanship, Flightmaster. Inc., will replace the defective hardware, software or documentation. The remedy for breach of this warranty shall be strictly limited to replacement of the defective item and shall not encompass any other damages of any kind.
Flightmaster, Inc., and Software 2000, Inc., specifically disclaim all other warranties, expressed or implied, including but not limited to implied warranties of merchantability and fitness for a particular purpose with respect to defects in the hardware, software and documentation. In no event shall Flightmaster, Inc., or Software 2000. Inc., be liable for loss of profit, bodily injury, or any other damages, including but not limited to special incidental, consequential or other damages.
Flightmaster, Inc., and Software 2000, Inc., reserve the right to make improvements and modifications in the hardware and software described herein at any time and without notice.
Safety of flight requires that you have a thorough understanding of the capabilities and limitations of your Flightmaster. Read and heed the following safety precautions (as well as others that appear elsewhere in this document).
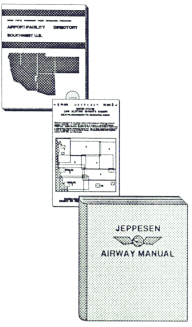
Navigational data: Never rely on the Flightmaster as your sole source of critical navigational information. Cross-check all such data against current aviation charts. The Flightmaster's built-in database is derived from data issued by the FAA National Flight Data Center. This data is revised by the FAA every 56 days. Database updates are available for your Flightmaster on either a one-time or annual-subscription basis. Even if you keep your Flightmaster updated, however, you must always treat your current aviation charts as the final authority on all critical-for-safety navigational data.
Automatic routing: It is imperative that you check out any route automatically derived by the Flightmaster against current aviation charts to make certain that the route can be flown safely and legally. The Flightmaster does not know about minimum safe altitudes, terminal control areas, prohibited areas, restricted areas, warning areas, military operations areas, notices to airmen, or one-way airways. Furthermore, the Flightmaster's database may not be current if you have not updated it recently.
Aircraft performance data: The Flightmaster performs trip planning calculations based upon aircraft-specific performance data which you enter into the machine for each particular aircraft you fly. Be certain that the performance data you enter is in agreement with the aircraft manufacturer's performance specifications, and that they truly represent the way that you intend to fly the aircraft. When entering aircraft performance data, it is prudent to err on the side of conservatism: enter the lowest airspeeds and highest fuel consumption rates consistent with your anticipated operating envelope.
In-flight discrepancies: Whenever you use the Flightmaster to monitor your in-flight progress, be alert for significant discrepancies between your actual fix arrival times and fuel burns and those calculated by the Flightmaster. Remember that the Flightmaster's calculations are only estimates predicated on book performance and forecast winds aloft. Always be certain that you have generous fuel reserves... legal minimum reserves are often not sufficient to ensure safety. Any time your actual progress or fuel consumption appears to differ from estimated values, you should determine why immediately. You may be encountering more adverse winds than forecast, or your aircraft may not be performing according to book specifications. In any such situation, it is important for you to re-evaluate your fuel reserves and possibly plan to land short of your intended destination.
Database updates and accessories for your Flightmaster may be ordered by contacting us as shown below. New database updates are released every 56 days as new data is received from the FAA. Updates may be ordered on a one-time or subscription basis, and we encourage you to keep your Flightmaster updated.
In addition, we offer a variety of accessories for your Flightmaster, including a printer, RS232 adapter, backup datapaks, carrying cases, and an AC power adapter. Accessories are discussed in detail in the last chapter of this User's Guide.
if you encounter any difficulty while using your Flightmaster and cannot resolve it by rereading the relevant section of this User's Guide, please contact us as shown below. We have Flightmaster experts available to help you.
In the unlikely event that you need to return your Flightmaster to us for repairs, call us first to obtain a return authorization. We will give you instructions on how to package your machine and how and where to send it.
If you are dissatisfied with your Flightmaster for any reason, you may return it to us within 30 days of purchase for a full refund, no questions asked. You must return your Flightmaster to us in undamaged condition in its original packaging. Call us first to obtain a return authorization, and ship the package to us insured in case of loss.
Flightmaster, Inc.
Lake Technology Park
P.O. Box 128
McHenry, MD 21541
(800) 462-6669 toll-free
(301) 387-7997
(301) 387-7322 FAX
74020,10 CompuServe
Highlights, 1 The Built-In Navigation Database, 4 The User-Defined Database, 5 Hardware Description, 7
Switching the Machine On, 9 Using the Keyboard, 9 Navigating the Menus, 11 Setting the Time-of-Day Clock, 12 Bringing up the Aviation Menu, 12 Switching the Machine Off, 13 Replacing the Battery, 13 Changing Datapaks, 14
Quick Estimates, 15 Your Aircraft Performance Profile, 16 Defining a New Profile, 18 Selecting Which Aircraft to Use, 21 Changing an Existing Profile, 21 Erasing Existing Profiles, 21 Specifying Your Route, 22 Defining a New Route, 22 Automatic VOR and RNAV Routing, 24 Automatic Airways Routing, 25 Amending the Current Route, 26 Reversing the Current Route, 26 Expanding the Current Route, 26 Saving the Current Route, 27 Loading a Previously-Saved Route, 27 Erasing Previously-Saved Routes, 27 Displaying an Initial Heading to Fly, 27 Calculating and Viewing the Trip Log, 28 Organization of the Trip Log, 28 Viewing the Trip Log, 30 Printing the Trip Log, 30 Monitoring Your In-Flight Progress, 31 FAA Flight Plans, 32 Creating a New Flight Plan, 32 Reviewing or Changing a Flight Plan, 33 Reversing a Flight Plan, 33 Saving a Flight Plan, 33 Loading a Previously-Saved Flight Plan, 33 Erasing Previously-Saved Flight Plans, 33 Printing a Flight Plan, 33
Your Aircraft W&B Template, 35 Designing a W&B Template, 36 Defining a New W&B Template, 40 Changing an Existing W&B Template, 41 Erasing an Existing W&B Template, 41 Working a W&B Calculation, 42
Your Personalized Checklists, 45 Defining New Checklists, 46 Changing Previously-Entered Checklists, 47 Erasing Previously-Entered Checklists, 47 Using Your Checklists, 48
Four-Function Arithmetic, 49 True Airspeed Calculations, 50 Density Altitude Calculations, 51 Unknown Wind Calculations, 52 Timing Functions, 53 Displaying the Current Date and Time, 53 Using the Flight, Tank, and Approach Timers, 53
Searching the Navigation Database, 55 Searching by Fix Identifier, 55 Searching by Facility Name, 56 Searching by Geographic Location, 56 Locating RNAV Waypoints, 57 Customizing the Navigation Database, 58 Defining Your Own Navigation Fixes, 58 Erasing User-Defined Navigation Fixes, 58 Flagging Inoperative Navaids, 58 Database Backup, 59 Backup to a Datapak, 59 Backup to a PC Disk via RS232, 59
Keeping Your Flightmaster Looking New, 61 Using Your Flightmaster in the Cockpit, 61 Using Your Flightmaster at Night, 61 Useful Accessories for Your Flightmaster, 62
You are about to experience a remarkable breakthrough in avionics technology: your new Flightmaster handheld flight management system. A tiny machine that weighs just 10.5 ounces and fits easily in your palm or pocket, the Flightmaster combines the power and precision of computer flight planning with a built-in easily-updatable navigation database that contains 11,000 fixes plus all U.S. airways. Nothing like this has ever been available to pilots before.
Here's a quick overview of the capabilities of your Flightmaster:
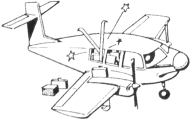
| »BEFORE LANDING |
| fuel select main close cowl flaps aux pumps low prop sync off props 2300 rpm flaps 15 gear down, 3 grn flaps full min Vref 93 kias mixtures rich props forward |
Until now, a computerized flight management system of this scope required at least a laptop computer weighing ten pounds and costing the better part of $2,000. And trying to use a laptop in the cockpit doesn't work... it's simply too awkward. Your Flightmaster gives you this capability in a package so small and convenient that you can always keep it on hand and use it in-flight. Moreover, the cost of your Flightmaster is just a fraction of what you'd have to spend on a laptop computer.

If you're not particularly computer-literate, don't worry about it! Your Flightmaster was designed for pilots by a pilot. It is menu-driven, easy to learn, and a snap to use. In fact, you can probably figure out how to use most of the Flightmaster's functions by trial-and-error. Don't be afraid to experiment with the many functions of the Flightmaster... it is impossible for you to damage the machine by pressing the wrong key.
But by all means do read through the rest of this User's Guide, trying out each function on your machine as you read about it, just to make absolutely sure you don't miss out on any of the Flightmaster's goodies!

The Flightmaster comes with a built-in easily-updatable navigation database that contains 11,000 fixes plus 13,000 airway segments. The standard built-in database comprises:
All the data in the Flightmaster's built-in navigation database comes from magnetic tapes issued by the FAA's National Flight Data Center (NFDC) and revised every 56 days. The effective date of the built-in database is displayed every time you start-up the Flightmaster's aviation software.
The built-in database is stored in a pair of thumb-sized datapaks that plug into the rear of the Flightmaster. You will want to update your navigation database from time to time, and this takes just a matter of seconds: simply slide out the old datapaks and slide in a new ones. You can order update datapaks for your Flightmaster on either a one-time or annual-subscription basis.
The Flightmaster aviation software is also stored on these same datapaks. Consequently, whenever you update the built-in database, you automatically update the software to the most current version.
In addition to the built-in navigation database, the Flightmaster maintains a user-defined database of various kinds of information that you will enter into the machine yourself, including:
| »BEFORE LANDING |
| fuel select main close cowl flaps aux pumps low prop sync off props 2300 rpm flaps 15 gear down, 3 grn flaps full min Vref 93 kias mixtures rich props forward |
The user-defined database is stored in the internal memory of the machine. The various kinds of user-defined data compete with one another for space in the internal memory. This means, for example, that if you define a very large number of your own user-defined navigation fixes or save a lot of routings. you may have to keep your checklists a bit short. And so forth.
This Internal RAM that stores your user-defined database is kept continually active by the battery, even when the machine is switched off, and is kept alive by a capacitor for up to 2 minutes when you change batteries. However, it is possible to lose the contents of internal RAM...here are some good ways:

In any case, if you succeed in losing the contents of internal RAM, you will wind up having to re-enter all the items in your user-defined database. This will be a memorable experience for you, and will teach you to be more careful when changing batteries.
You can use the optional AC adapter to eliminate the time constraints when changing batteries. Alternatively, you may wish to make a backup copy of your user-defined database to protect yourself against data loss. There are two alternative backup procedures supported by the Flightmaster software:
Both of these backup methods are described in detail later in this manual.
Note that the Flightmaster's software and built-in navigation database are stored on non-volatile datapaks. Consequently, they are perfectly safe even if all power is removed from the machine for an extended period of time.

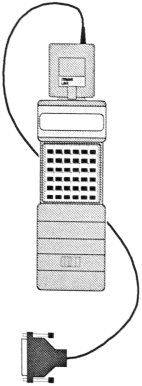
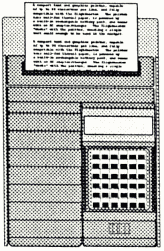
The Flightmaster utilizes a unique ultra-miniaturized personal computer called the PSION Organiser II Model XP manufactured in England. The whole machine fits easily into your pocket or the palm of your hand, and weighs just 10.5 ounces. It is powered by an ordinary 9-volt alkaline battery, which normally lasts for months of use before needing replacement.
The unit incorporates an 8-bit microprocessor, a high-legibility LCD dot-matrix display, and a 36-key alphanumeric keyboard protected by a sliding cover. It has 63K of internal memory... 32K of ROM plus 31K of RAM. The internal RAM is kept continuously active by the battery, even when the machine is switched off. When replacing the battery, a capacitor preserves the internal RAM for up to 2 minutes.
The internal ROM contains the operating system and an interpreter for the machine's high-level programming language called "OPL" (a dialect of BASIC). The internal ROM also includes several built-in application programs: a general-purpose database management system, a diary system, a perpetual calendar. an alarm-clock system with multiple alarms, and a calculator with numerous mathematical and scientific functions. The machine is user-programmable in both OPL and assembly-language. See the PSION Operating Manual for details.
Perhaps the most unusual feature of the machine is that it has two rear-mounted slots which accommodate removable EPROM datapaks that are available in various sizes up to 128K each. This provides up to 256K of nonvolatile storage for software and data. It is precisely this feature that makes this unit so ideally suited for database-oriented applications like the Flightmaster.
The device also has a top-mounted accessory socket which can accommodate a variety of optional peripheral devices. Presently-available peripherals include a compact battery-powered thermal printer which "docks" With the machine (below), an RS232 asynchronous communications adapter (facing page), several types of barcode readers, and a magnetic stripe reader.
Note: You can skip this page unless you happen to have a special interest in electronics or computer hardware.
Well then, since you must be a dyed-in-the-wool computer nut, here are some interesting nitty-gritty details about the PSION Organiser II hardware:
As you read through the manual from this point on, it's a good idea to have your Flightmaster handy and follow along with the text. This way, you will wind up educating your fingers as well as your brain.

To switch the machine on, press the ON/CLEAR key. After a brief delay (about one second), you will see the display become active. Use the contrast wheel on the right edge of the machine to adjust the display contrast until it looks best to you.
Take a careful look at the Flightmaster's keyboard. It consists of 36 keys arranged in a 6-by-6 array. Most of the keys have two labels: one on the key itself, and the other above the key. The letter keys produce a letter A-Z if the keyboard is in alphabetic mode, and a digit 0-9 or a punctuation character if the keyboard is in numeric mode.
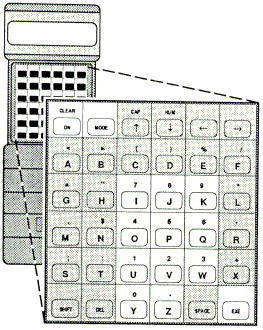
The Flightmaster always tries to put the keyboard in the appropriate mode for the data you are entering. For example, it selects alphabetic mode when it prompts you to enter a fix identifier, and numeric mode when it prompts you to enter an altitude.
Note: You can easily tell which mode the keyboard is in by looking at the cursor on the LCD display: a flashing block cursor indicates that the keyboard is in alphabetic mode, While a solid underline cursor denotes numeric mode.
You can temporarily shift the keyboard to the opposite mode by holding down the SHIFT key. This would be necessary, for example, when entering an airport identifier that contains digits.
Some of the keys on the keyboard have special meanings:
The Flightmaster software is menu-operated. A menu is simply a list of functions that appears on the display, if the menu is too large to fit on the display all at once, you can scroll through it using the cursor keys. The ← and → keys move the cursor through the menu one item at a time, while the ↑ and ↓ keys move a the cursor line at a time.
To select a particular menu item, position the cursor to the desired item and then press the EXE key to execute the selected function. Alternately, you can simply press the letter key corresponding to the first letter of the desired menu item. (E.g., press Q for Quick, R for Route, V for View, etc.)
The diagram below depicts the menu structure of the Flightmaster. Observe that some menu selections invoke a subordinate menu or sub-menu. You can select an item from a sub-menu using either of the two methods described above, or you can exit the sub-menu and return to the higher-level menu by pressing the ON/CLEAR key.

The Flightmaster has a very accurate time-of-day clock. At your option, you can set it to local time or Coordinated Universal Time, also known as UTC, GMT, or Zulu time. For use in aviation, particularly if you fly IFR, it is usually most convenient to set the Flightmaster's clock to Zulu time.

To set the time, select TIME from the main menu (not Time from the aviation menu). You will see a date/ time display that looks like this:
TUE 26 JAN 1999 21:40:43
with the seconds counting up in real-time. If the date and time are correct already, simply press ON/CLEAR to return to the main menu.
However, if you want to adjust the date or time, press the MODE key. You will see the cursor (a flashing block) appear over the day of the month, and you can adjust it up or down using the ↑ and ↓ keys until it is correct. To adjust the month, year, hours, minutes and seconds, use the ← and → keys to move the cursor to the item you want to adjust, then use the ↑ and ↓ keys to adjust the item up or down until it is correct.
When the date and time are correct, press EXE to make your changes effective (the cursor will disappear), and then ON/CLEAR to return to the main menu.
Note: The aviation menu also has a Time function which displays the date and time, but that function does not allow you to adjust the clock.
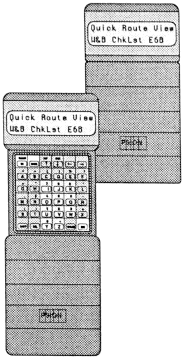
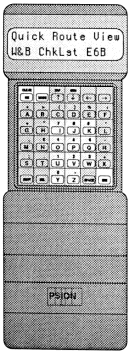
Selecting AVIATION from the main menu invokes the Flightmaster's aviation software. You will see brief displays of the software version, a copyright notice, and the database revision cycle date. Then, you will see the First two lines of the aviation menu:
Quick Route View W&B ChkLst E6B FltPln DataBase Print Time Acft Setup Off
The next several chapters of this manual describe how to use each of these aviation menu functions.
To switch the machine off select OFF from the menu (or just press the O key). You can also switch the machine off from within certain Flightmaster functions (View, ChkLst, and Time) by pressing the O key.

Unlike a conventional computer, the Flightmaster does not lose its place or any data when it is switched off. Switching the machine back on with the ON/CLEAR key leaves the machine exactly where it was when you switched it off. For maximum battery life, it is a good idea to switch the machine off Whenever you are not actually looking at it.
To conserve battery power, the machine will switch itself off automatically after five minutes if you have not pressed any keys. Once again, nothing is lost and switching the machine back on with the ON/CLEAR key leaves the machine exactly where it was at when it switched itself off.
The Flightmaster will typically operate for months of normal use on a 9-volt alkaline battery. You can expect the battery to last anywhere between one and six months depending on how you use your Flightmaster...typical battery life seems to be about two or three months.
When the battery runs low (less than 5.5 volts under load), the Flightmaster will display a LOW BATTERY message. Whenever you see this warning, shut the machine off and replace the battery prior to further use. For in-flight use, you should always carry a fresh spare battery in your flight case.
Before changing the battery, be sure that the machine is switched off. If the machine is still switched on when the battery is removed, all data will be lost from internal memory (including your aircraft performance info, checklists, W&B templates, etc.).
Remove the old battery and insert the new one immediately, positive-terminal first. If the new battery is not installed within about 30 seconds, it may be necessary to reset the machines time-of-day clock. If the new battery is not installed within a minute or so, you risk losing the contents of internal memory. Note: the weaker the old battery is, the less time you have to put the new one in. Using the optional AC adapter while changing batteries eliminates these time constraints.
For best results, use only top-quality alkaline batteries, such as Eveready "Energizer", Kodak "Supralife", and Mallory "Duracell" brands. You can use ordinary 9-volt carbon-zinc batteries or rechargable nickel-cadmium batteries in a pinch, but they won't last nearly as long. Furthermore, carbon-zinc batteries might leak and damage the machine. It's best to stick with alkalines.
To update the Flightmaster navigation database and software. you will have to change datapaks. This takes only a few seconds, but be sure you follow this procedure:
Exit AVIATION program? [Y/N]
respond by pressing the Y key.
Trip planning is at the heart of the Flightmaster's capabilities, and its most often-used function, so that's where you should begin. Start by doing a few quick time-course-distance calculations. Then key-in the performance data for your aircraft and move on to the more elaborate trip planning functions including automatic route selection and in-flight progress monitoring. Don't forget to try out each junction on your Flightmaster as you read about it...that's the best way to learn the machine!
The first item in the Flightmaster's aviation menu is Quick. Select this menu function whenever you want to do a quick calculation of course, distance and estimated flying time from one fix to another without disturbing the current route or trip log.
First you see the prompt From fix:. Enter the fix identifier of any fix (airport, navaid, or intersection) and then press EXE. If you make a mistake keying the fix identifier, you can press the DEL key to backspace or the ON/CLEAR key to erase the entire entry and start over.
Next you see the prompt To fix:. Key-in another fix identifier followed by EXE.
Finally you are prompted for Groundspeed:. If there is an active trip log, this prompt will be followed by a default groundspeed (the calculated cruise speed for the active trip). Press EXE to use the default value, or key-in a groundspeed (in knots) followed by EXE. You may also leave the groundspeed blank if you don't need estimated flying time.
After about one second, the machine displays the magnetic course, the distance in nautical miles, and the estimated flying time in hours and minutes. (If you left the groundspeed blank, the flying time calculation is omitted.)
| Example: |
From fix: DAL EXE
To fix: HOU EXE Groundspeed: 165 EXE Quick DALa→HOUa 151° 208nm 1:16 |
You can then press ON/CLEAR to return to the main aviation menu, or press any other key (such as EXE) to do another Quick calculation for a different pair of fixes.
If you enter a three-letter identifier which ambiguously identifies both a navaid and an airport (such as ICT, the identifier for both the Wichita Mid-Continent Airport and the Wichita VORTAC), the Flightmaster assumes that you mean the navaid. To specify that you mean the airport rather than the navaid. prefix the identifier with a K (e.g., KICT).
| Example: |
From fix: KICT EXE
To fix: ICT EXE Groundspeed: 165 EXE Quick ICTa→ICT 302° 9nm 0:03 |
Note that the suffix "a" in ICTa denotes an airport. Similarly, the suffix "n" denotes an NDB, and "w" denotes an RNAV waypoint. No suffix is used for VORs and intersections.
If you enter a fix identifier that cannot be found anywhere in the Flightmaster's navigation database (including your own database of user-defined fixes), you hear a beep and see the following message:
Can't find XXX Define it? [Y/N]
If you respond by pressing N, you are prompted to re-enter the identifier. However, if you respond by pressing Y, the Flightmaster gives you the opportunity to define this identifier and save it in your database of user-defined fixes...after which it proceeds with the Quick calculation. The details of the procedure for defining a new fix are described later on in the chapter on Database Access.
The Flightmaster's more sophisticated trip planning features depend upon having access to performance data for your aircraft in order to accurately calculate the groundspeeds and fuel burns for the climb, cruise and descent portions of each trip. Before you can make use of these features, therefore, you will have to define a performance profile for your aircraft. If you fly several different aircraft, you will probably want to set up performance profiles for each of them.
Remember, you only have to enter this information once. It becomes a permanent part of the Flightmaster's database. So get out your aircraft's Pilot Operating Handbook (POH), photocopy the accompanying Aircraft Performance Profile Worksheet, and let's get started...
| Aircraft Performance Profile Worksheet | |||
| A/C ID: | N ______ | ||
| A/C type/equip: | ________/__ | ||
| A/C colors: | __________________ | ||
| Pilot's name: | __________________ | ← FAA Flight Plan Information | |
| A/C home base: | __________________ | ||
| Telephone No.: | __________________ | ||
| Fuel units used: | [] Gallons & GPH | ||
| [] Pounds & PPH | |||
| Fuel allowance for taxi & takeoff: _ ______ (lbs/gals) | |||
| Climb to 5000' | Time: _____min | Dist: _____nm | Fuel: _____(lbs/gals) |
| Climb to 10000 | Time: _____min | Dist: _____nm | Fuel: _____(lbs/gals) |
| Climb to 15000' | Time: _____min | Dist: _____nm | Fuel: _____(lbs/gals) |
| Climb to FL200 | Time: _____min | Dist: _____nm | Fuel: _____(lbs/gals) |
| Climb to FL250 | Time: _____min | Dist: _____nm | Fuel: _____(lbs/gals) |
| Climb to FL300 | Time: _____min | Dist: _____nm | Fuel: _____(lbs/gals) |
| Cruise at S.L. | KTAS: _____kts | Fuel flow: _____/hr | |
| Cruise at 5000' | KTAS: _____kts | Fuel flow: _____/hr | |
| Cruise at 10000' | KTAS: _____kts | Fuel flow: _____/hr | |
| Cruise at 15000' | KTAS: _____kts | Fuel flow: _____/hr | |
| Cruise at FL200 | KTAS: _____kts | Fuel flow: _____/hr | |
| Cruise at FL250 | KTAS: _____kts | Fuel flow: _____/hr | |
| Cruise at FL300 | KTAS: _____kts | Fuel flow: _____/hr | |
| Descent fm 5000' | Time: _____min | Dist: _____nm | Fuel: _____(lbs/gals) |
| Descent fm 10000' | Time: _____min | Dist: _____nm | Fuel: _____(lbs/gals) |
| Descent fm 15000' | Time: _____min | Dist: _____nm | Fuel: _____(lbs/gals) |
| Descent fm FL200 | Time: _____min | Dist: _____nm | Fuel: _____(lbs/gals) |
| Descent fm FL250 | Time: _____min | Dist: _____nm | Fuel: _____(lbs/gals) |
| Descent fm FL300 | Time: _____min | Dist: _____nm | Fuel: _____(lbs/gals) |
Starting from the aviation menu, make the following menu selections in sequence: Setup→Aircraft→Define. The Flightmaster prompts you for various items of information about to your aircraft in the sequence shown on the worksheet.
First, you see the prompt A/C ID:. Enter your aircraft's identification (usually its N-number) up to six characters in length. The keyboard will be in alphabetic mode, so you will have to press SHIFT to key-in digits. If you enter an aircraft ID for which the Flightmaster already has a performance profile in its database, you hear a beep and see the message:
N54321 exists, redefine? [Y/N]
to which you must respond by keying N to quit or Y to continue.
Next, you are prompted to enter five items of textual information that the Flightmaster uses when it fills out FAA flight plan forms for you:
A/C type/equip: C340/R EXE
A/C colors: WHITE+RED+BLUE EXE
Pilot's name: JOE J DOAKS EXE
A/C home base: LPC EXE
Telephone no.: 805-555-1212 EXE
Next, you see the message Fuel units used: Pounds & PPH. If you press SPACE the message changes to Gallons & GPH. Select whichever alternative you prefer to use for this aircraft, then press EXE.
Next, you are prompted to enter Fuel for taxi & T/O:. Key in the pre-takeoff fuel allowance (in pounds or gallons, whichever you selected) as specified in your POH. If your POH doesn't state an allowance, make your own estimate. (For piston-powered aircraft, 15-20% of your normal hourly cruise fuel flow is usually reasonable.)
At this point, you are asked to enter information about the climb performance of your aircraft...specifically, the time, fuel, and distance required to climb from sea level to various altitudes under no-wind conditions. If you are lucky, your POH will have a graph or table entitled Time, Fuel and Distance to Climb - Cruise Climb or something similar, and you can enter the necessary climb performance information directly from it. Otherwise, you will have to research, calculate, or estimate the information. In any case, you must choose a series of altitudes for which you will enter the time, fuel and distance to climb information. For instance, you might decide to enter climb performance figures for multiples of 2.000', 5.000' or 10.000' (whatever is appropriate for your aircraft) up to the service ceiling of the aircraft. For intermediate altitudes, the Flightmaster interpolates as required.
Enter the figures for each altitude in response to the prompts (leave off the last two zeroes from the altitudes if you wish):

Climb to what altitude: 50 EXE
Climb to 5000, Time (min): 4 EXE
Climb to 5000, Dist (NM): 9 EXE
Climb to 5000, Fuel (lbs): 18 EXE
Climb to what altitude: 150 EXE
Climb to 15000, Time (min): 15 EXE
Climb to 15000, Dist (NM): 34 EXE
Climb to 15000, Fuel (lbs): 60 EXE
Climb to what altitude: 250 EXE
Climb to FL250, Time (min): 31 EXE
Climb to FL250, Dist (NM): 76 EXE
Climb to FL250, Fuel (lbs): 125 EXE
Climb to what altitude: EXE
To indicate that you are finished entering climb performance information, press EXE at the ...what altitude: prompt.
Next, you are asked to enter information about the cruise performance of your aircraft...specifically, the true airspeed and fuel flow when cruising at sea level and various other altitudes. You can obtain this data from the Cruise Performance tables in your POH. Choose figures corresponding to the cruise power settings you use normally. Once again, you must choose a series of altitudes for which you will enter the cruise TAS and fuel flow information...this will probably be dictated by the format of the tables in your POH. The first set of cruise numbers is always for sea level: the remaining sets are for altitudes of your choice:
Cruise at S.L., KTAS: 164 EXE
Cruise at S.L., Fuel (pph): 171 EXE
Cruise at what altitude: 50 EXE
Cruise at 5000, KTAS: 171 EXE
Cruise at 5000, Fuel (pph): 171 EXE
Cruise at what altitude: 150 EXE
Cruise at 15000, KTAS: 187 EXE
Cruise at 15000, Fuel (pph): 171 EXE
Cruise at what altitude: 250 EXE
Cruise at FL250, KTAS: 186 EXE
Cruise at FL250, Fuel (pph): 152 EXE
Cruise at what altitude: EXE
If your POH doesn't have cruise numbers for sea level, either extrapolate or simply use figures for the lowest altitude given in the POH. To indicate that you are finished entering cruise performance data, press EXE at the ...what altitude: prompt.
Finally, you are asked to enter information about the descent performance of your aircraft... specifically, the time, fuel, and distance required to descend from various altitudes to sea level under no-wind conditions. With luck, your POH contains a graph or table entitled Time, Fuel and Distance to Descend from which you can derive the necessary descent performance information.
Unfortunately, many small-aircraft POHS do not contain descent data. If yours doesn't, you will have to research, calculate, or estimate the information. For a normally-aspirated piston airplane, it is often sufficient to make one entry corresponding to the service ceiling of the airplane, assuming a 500 feet-per-minute descent at top-of-the-green airspeed and fuel consumption equivalent to an economy-cruise power setting. [For example: if we assume a 500-fpm descent at 120 knots groundspeed and fuel consumption of 6 gallons-per-hour from a service ceiling of 12.000', the entry might be: altitude = 12000', time-to-descend = 24 minutes, distance-to-descend = 48 nm, and fuel-to-descend = 2.4 gallons.] For a turbocharged airplane, a commonly-used descent profile assumes a 1,000-fpm descent from the service ceiling to 10.000', and a 500-fpm descent from there down to sea level...in this case, at least two entries are needed.
As before, you must choose a series of altitudes for which to enter the time-, fuel- and distance-to-descend information:
Descent fm what altitude: 50 EXE
Descent fm 5000, Time (min): 4 EXE
Descent fm 5000, Dist (NM): 7 EXE
Descent fm 5000, Fuel (lbs): 5 EXE
Descent fm what altitude: 150 EXE
Descent fm 15000, Time (min): 11 EXE
Descent fm 15000, Dist (NM): 36 EXE
Descent fm 15000, Fuel (lbs): 25 EXE
Descent fm what altitude: 250 EXE
Descent fm FL250, Time (min): 16 EXE
Descent fm FL250, Dist (NM): 55 EXE
Descent fm FL250, Fuel (lbs): 37 EXE
Descent fm what altitude: EXE
To indicate that you are finished entering descent performance information, press EXE at the ...what altitude: prompt. You then see the following message:
OK to save N54321 (Y/N)?
to which you must respond by keying Y to save the performance profile in the Flightmaster's database, or N to discard the profile. (You will be sure to answer Y after all that hard work. won't you?)
If you have defined performance profiles for several aircraft, you must tell the Flightmaster which aircraft to use for its flight planning calculations. To do this, select Acft from the aviation menu, scroll to the desired aircraft using the ↑ and ↓ keys, and then press EXE to select that aircraft as the currently-active one.
If you have defined only one aircraft profile in the Flightmaster's database, this step is unnecessary.
To review and/or change any of the entries in a previously-entered aircraft performance profile, start from the aviation menu and make the following menu selections in sequence: Setup→Aircraft→Change. You can Scroll up and down through the various items in the profile by using the ↑ and ↓ cursor keys.
If you want to change any item, press EXE. The item moves to the left of the display, and the cursor appears. Now edit the item in the usual fashion, using the cursor keys, the DEL key (to erase characters), and the ON/CLEAR key (to clear the old entry altogether). When done editing, press EXE. Now you can scroll up or down to another item. Note: You cannot add additional altitudes or delete existing altitudes with this function.
When you're all done, press ON/CLEAR. If you have made any changes to the performance profile, you see the message:
OK to save N54321? [Y/N]
to which you must respond by keying Y to save the revised performance profile in the Flightmaster's database, or N to discard the changes.
To erase a previously-entered aircraft performance profile from the Flightmaster's database, start from the aviation menu and make the following menu selections in sequence: Setup→Aircraft→Erase. You see the message:
OK to delete N54321? [Y/N]
to which you must respond by keying Y to erase the aircraft from the Flightmaster's database, or N to retain it.
Important Note: Erasing the performance profile for an aircraft also erases any W&B or checklist data for that aircraft. There's no way to un-erase data that has been erased. Be quite sure that's what you want to do before answering Y to the confirmation prompt.
Before the Flightmaster can plan a flight for you, it has to know three things:
Selecting Route from the aviation menu brings up a sub-menu of functions for specifying route, altitude and winds:
New Change Revrs Xpand Load Save Erase Quick
Starting from the aviation menu, make the following menu selections in sequence: Route→New. The Flightmaster prompts you to specify a new route, altitude, and Winds aloft forecast.
At the Route: prompt, enter a sequence of fix identifiers (at least two!) separated by spaces or punctuation (such as periods). Airway designators such as V186 or J11 may be interspersed between fixes. In addition, the three special route Specifications V, R, and A have special meaning when interspersed between fixes:
V denotes automatic VOR-to-VOR routing
R denotes automatic RNAV-direct routing
A denotes automatic routing by airways
More about automatic routing shortly.
Here are some examples of valid Route: responses:
TEB CDW
Teterboro, direct Caldwell
FTW R ICT
Fort Worth, auto-RNAV-direct to Wichita
SMX V OSI SFO
Santa Maria, auto-VOR routing to Woodside, direct San Francisco
TEB BREZY R MHT
Teterboro, direct BREZY intersection, auto-RNAV-direct to Manchester
SBA..RZS.J88.SNS.J110.OAK
Santa Barbara, direct San Marcus, Jet Route 86 to Salinas, Jet Route 710 to Oakland
EWR RBV A OTT DCA
Newark, direct Robinsville, automatic routing by airways to Nottingham, direct Washington
After you have entered the route and pressed EXE, the machine checks the route for validity and looks up each fix and airway identifier in its navigation database. If you have specified any fix identifiers that are not defined in the database, the machine beeps and says:
Can't find BREZY define it? [Y/N]
If you respond Y, you will be prompted to define the location of the unknown fix(es) and to save the definition(s) in the user-defined-fix database for future reference. If you respond N, you will be prompted to edit your route specification.
The machine will also beep and complain if your route contains any airway designators that are not defined in the database, if a designated airway does not connect the two specified fixes, or if a specified airway segment contains a gap. In any of these cases, you will be returned to the Route: prompt and allowed to edit your route.
Next you will see the Altitude: prompt. Enter your cruising altitude in feet MSL (e.g., 5500, 13000, 31000). Alternately, you may leave off the last two zeroes and enter your cruising flight level (e.g., 55, 130, 310). The two methods are equivalent.
Next you will be prompted for Winds aloft:. In response to this prompt, you have three options:
SBA=2715 SFO=3008 PDX=3311 SEA=0223
In this case, after you press EXE, the machine checks the entry for validity and looks up each station identifier in its database. When the Flightmaster later calculates your trip, it will use the forecast wind from the closest station to compute each leg of the trip.
Note: the Flightmaster puts the keyboard in numeric shift at the Winds aloft: prompt, so you have to press the SHIFT key to enter the alphabetic station identifiers.
When you have finished entering your route, altitude and winds, the Flightmaster considers this information to be the current route, and uses it for all subsequent flight planning functions until you change it.
Perhaps the most sophisticated capability of the Flightmaster is its ability to do automatic VOR-to-VOR, RNAV-direct, and airways routing for you. As you have seen, this automatic routing feature is invoked simply by entering a V, R or A between a pair of fixes when you specify your route at the Route: prompt.
When you ask for an auto-RNAV-direct routing from one fix to another, the Flightmaster scans its database of navaids to find all the VORTACS and VOR/DMEs that are reasonably close to the optimum great-circle route. If your cruising altitude is at FL180 or above, it limits the search to high-altitude navaids. It then selects a set of these navaids that provide reasonable leg distances for your cruising altitude (i.e., longer legs at higher altitudes). Finally, it plots RNAV waypoints along the great-circle route for each of the selected navaids.
Automatic VOR-to-VOR routing works in a similar fashion, with a few important differences. To minimize the amount of zig-zagging in the route, the Flightmaster is somewhat more selective in choosing navaids close to the optimum great-circle route. However, VORs without DME are eligible. The resulting route is plotted using the navaids themselves, rather than offset RNAV waypoints.
If you want the Flightmaster to refrain from using certain navaids in its automatic routing (because you know that those navaids are NOTAMed out-of-service, for example), you can specify a list of ineligible navaids. To do this, select menu function DataBase→Inop and enter a list of navaid identifiers.
As you might expect, these automatic routing functions involve quite a lot of database searching and trigonometric computation, so they take some time to perform. A coast-to-coast route might take two or three minutes of processing, depending on the cruising altitude and whether RNAV or VOR routing is requested. Low altitudes take longer for two reasons: there are more navaids to consider (low-altitude navaids are eligible), and there are more waypoints to plot (since the leg lengths must be shorter). Auto-VOR routing takes a bit less time to plot than Auto-RNAV routing, since the waypoint-offset calculations are not necessary.
Hint for advanced users: Auto-VOR routing will often produce better results when you specify altitudes below FL180, since there are more eligible navaids to choose from and thus fewer zig-zags necessary. Alternatively, if you use VL or RL in place of V or R in your route specification, the Flightmaster will use low-altitude navaids even though your cruising altitude is FL180 or above.

The automatic routing-by-airways feature is invoked by entering an A between a pair of fixes when you specify your route at the Route: prompt. The Flightmaster attempts to find an airway or combination of airways that connects the two fixes and does not stray unreasonably far from the optimum great-circle route between them. It uses Jet Routes if your specified cruising altitude is FL180 or above, and Victor Airways if below FL180. If the machine is unable to find a suitable airways route, it will employ automatic VOR-to-VOR routing for part or all of the route.
It is important to understand something of how the Flightmaster's automatic airways routing algorithm works. It does not attempt to find the absolutely optimal route from point A to point B- if you want that, you should ask for auto-RNAV or auto-VOR routing. Instead, it tries to find a "reasonable" airways routing with the smallest possible number of airway changes.
If there is a single airway that connects point A and point B, the Flightmaster always chooses that airway. Otherwise, it searches for the airway passing through point A that goes as far as possible toward point B without deviating unreasonably from the great-circle route. Let's say it discovers that the best it can do is to get to point C. Now the machine searches for the airway passing through point B that goes as far as possible toward point C. It continues to search both forward and backward until either the routes meet in the middle or it can't find an acceptable airway. In the latter case, it reverts to auto-VOR routing to complete the route.
This is actually rather similar to the way you might chose a route for a cross-country automobile trip. You find an interstate headed in more-or-less the right direction, then stick with it (cruise control and stereo on) until that route threatens to take you too far astray, at which point you change to a more suitable highway and stick with it as long as you can. You don't stop at each offramp to look for short-cuts. (Do you?)
It can actually be quite fascinating to watch the machine work at this! Generally it comes up with a reasonably good route. Sometimes, it does brilliantly well. Occasionally, it follows a promising airway too far and winds up at an intermediate navaid with no way to go but VOR-direct.
Very, very important: It is imperative that you check out the route that the Flightmaster comes up with on your current set of aviation charts! The machine doesn't know about MEAs, TCAS, prohibited, restricted or warning areas, MOAs, NOTAMS, or one-way airways. Furthermore, its database may very well be more than 56 days old (check the date). Never, never trust the Flightmaster as your sole source of navigational data!
Starting from the aviation menu, make the following menu selections in sequence: Route→Change. The Flightmaster prompts you to edit the current route, cruising altitude, and winds aloft forecast. The procedure is identical to Route→New except that each item defaults to its previous value instead of starting out blank.
Here's a handy shortcut for returning whence you came. Starting from the aviation menu, make the following menu selections in sequence: Route→Revrs. The Flightmaster reverses the current route left-to-right, then prompts you to edit the route (now reversed), cruising altitude, and winds aloft forecast. Identical to Route→Change except that the route is reversed.
Hint: Don't forget to change your cruising altitude from odd to even or vice-versa.
Starting from the aviation menu, make the following menu selections in sequence: Route→Xpand. The Flightmaster expands any auto-VOR routing specified in the current route into a series of VORs. If there is any auto-RNAV or airways routing specified, it asks you whether or not you want those expanded. If you answer yes, auto-RNAV segments are expanded into a series of waypoints (see note below) and airways segments are expanded into a series of navaids and turnpoint-intersections.
Then it prompts you to edit the route (now expanded), cruising altitude, and winds aloft forecast. Identical to Route→Change except that the route is expanded first.
Xpand allows you to make use of the automatic routing capabilities of the Flightmaster but to make manual revisions (e.g.. in order to avoid special-use airspace).
Note: If you expand a route containing an Auto-RNAV segment, the automatically-plotted intermediate waypoints appear in the expanded route in the FAA-standard format XXXrrrddd. For example, a waypoint which is located 12 nm out on the 096° radial of the VNY VORTAC would appear as VNY096012 in the expanded route. You can key-in your own waypoints using this notation, and you can even include such waypoints in your IFR flight plans (since this is the same waypoint notation that the FAA computers use).
You can save the current route in the Flightmaster's user-defined database for later retrieval. Starting from the aviation menu, make the following menu selections in sequence: Route→Save. You see the prompt Save: followed by a default name under which to save the route. The default name consists of the first and last fix identifiers separated with a hyphen leg.. EWR-DCA), but you can edit this name if you wish. Press EXE to save the current route, or ON/CLEAR to abort. If you try to save a route with the same name as a previously-saved route, you will hear a beep and see a warning message:
EWR DCA exists Overwrite? [Y/N]
Respond Y to overwrite the previously-saved route with the current one, or N to leave the previously-saved route intact.
Starting from the aviation menu, make the following menu selections in sequence: Route→Load. You see the prompt Load: followed by the name of the first saved route in the database. Use the ↑ and ↓ cursor keys to scroll through the directory of saved routes until you find the one that you want to load, then press EXE. The Flightmaster retrieves the saved route and allows you to edit it (same procedure as Route→Change). Or press ON/CLEAR to exit this function without loading anything.
Starting from the aviation menu, make the following menu selections in sequence: Route→Erase. You see the prompt Erase: followed by the name of the first saved route in the database. Use the ↑ and ↓ cursor keys to scroll through the directory of saved routes until you find the one that you want to erase, then press EXE to erase (you are prompted to confirm) or ON/CLEAR to exit without erasing.
Starting from the aviation menu, make the following menu selections in sequence: Route→Quick. The Flightmaster quickly computes the magnetic heading and distance for the first leg of your trip:
Quick SMXa→RZS 110° 41nm
Press any key to return to the aviation menu.

Once you have specified your route, cruising altitude and winds aloft using the Route function, you can ask the Flightmaster to calculate and display a detailed leg-by-leg trip log. Simply select View from the aviation menu.
The Flightmaster performs its trip log calculations only when necessary. Navigation, time and fuel calculations are necessary when View is invoked for the first time after program startup, and again whenever the route has been changed. Time and fuel calculations are also necessary when the cruising altitude or Winds aloft have been changed. As the trip log calculations proceed in sequence, the Flightmaster displays progress messages to let you know just what it is doing.
The trip log is displayed in the form of a "spreadsheet". The spreadsheet has twelve columns (labelled A, B, C, ....L). and a variable number of rows (labelled 0,1,2,...,n for an n-leg trip). As you read through the remainder of this section, study this sample trip log for a trip from Santa Monica CA to San Jose CA via the route SMO VTU R SJC:
| A | B | C | D | E | F | G | H | I | J | K | L | ||
|---|---|---|---|---|---|---|---|---|---|---|---|---|---|
| 0 | Trip SMOa-SJCa 270 nm 1:36 | Trip SMOa-SJCa Gt Circ 263 nm | Trip SMOa-SJCa Excess 7 nm | Trip SMOa-SJCa Fuel 295 lbs | Trip SMOa-SJCa Avg GS 169 K | Trip SMOa-SJCa Cruise 182 KTAS | Trip SMOa-SJCa Cruise Alt 8000 | Trip SMOa-SJCa Climb 0:09 | Trip SOa-SJCa Descent 0:16 | Trip SMOa-SJCa Cruise 1:11 | Trip SMOa-SJCa Flow 163 pph | Trip SMOa-SJCa Off SMOa 06:22 | 0 |
| 1 | 1a) SMOa-VTU 267°F 30nm 0:13 | 1b) SMOa 267°F CTAF 120.1 | 1c) SMOa 267°F N34-01 W118-27 | 1d) SMOa 267°F SANTA MONICA CA | 1e) VTU 266°T Freq. 108.2 | 1f) VTU 266°T N34-07 W119-03 | 1g) VTU 266°T VENTURA CA | 1h) SMOa-VTU Wind 330° at 9K | 1i) SMOa-VTU GS 141K WCA +2° | 1j) At VTU TTE 0:13 (1:23) | 1k) At VTU Fuel 70 (225) | 1l) At VTU ATA 06:36 -1 | 1 |
| 2 | 2a) VTU-FLW 311°F 71nm 0:25 | 2b) VTU 311°F Freq. 108.2 | 2c) VTU 311°F N34-07 W119-03 | 2d) VTU 31l°F VENTURA CA | 2e) FLW 309°T Freq. 117.5 | 2f) FLW 309°T N35-06 W119-52 | 2g) FLW 309°T FELLOWS CA | 2h) VTU-FLW Wind 330° at 9K | 2i) VTU-FLW GS 173K WCA ---° | 2j) At FLW TTE 0:38 (0:58) | 2k) At FLW Fuel 137 (158) | 2l) At FLW ATA 06:59 +1 | 2 |
| 3 | 3a) FLW-PRBW 308°F 50nm 0:17 | 3b) FLW 308°F Freq. 117.5 | 3c) FLW 308°F N35-06 W119-52 | 3d) FLW 308°F FELLOWS CA | 3e) PRBW 308°T 114.3 040°/9 | 3f) PRBw 308°T N35-46 W120-28 | 3g) PRBw 308°T PASO ROBLES CA | 3h) FLW-PRBw Wind 330° at 9K | 3i) FLW-PRBw GS 173K WCA ---° | 3j) At PRBw TTE 0:55 (0:41) | 3k) At PRBw Fuel 184 (111) | 3l) At PRBw ETA 07:16 +3 | 3 |
| 4 | 4a) PRBw-SNSw 308°F 75nm 0:26 | 4b) PRBW 308°F 114.3 040°/9 | 4c) PRBW 308°F N35-46 W120-28 | 4d) PRBW 308°F PASO ROBLES CA | 4e) SNSW 307°T 117.3 040°/12 | 4f) SNSw 307°T N35-47 W121-23 | 4g) SNSw 307°T SALINAS CA | 4h) PRBw-SNSw Wind 020° at 15K | 4i) PRBw-SNSw GS 173K WCA +4° | 4j) At SMSw TTE 1:21 (0:15) | 4k) At SNSw Fuel 255 (40) | 4l) At SNSw ETA 07:42 +49 | 4 |
| 5 | 5a) SNSw-SJCw 307°F 43nm 0:15 | 5b) SNSW 307°F 117.3 040°/12 | SC) SNSw 307°F N35-47 W121-23 | 5d) SNSW 307°F SALINAS CA | 5e) SJCw 306°T 114.1 163°/0.1 | 5f) SJCw 306°T N37-22 W121-56 | 5g) SJCw 306°T SAN JOSE CA | 5h) SNSw-SJCw Wind 020° at 15K | 5i) SNSw-SJCw GS 175K WCA +4° | 5j) At SJCw TTE 1:36 | 5k) At SJCw Fuel 295 lbs | 5l) At SJCw ETA 07:57 +1:04 | 5 |
| 6 | 6a) SJCw-SJCa ---°F 0nm 0:00 | 6b) SJCW ---°F 114.1 163°/0.1 | 6c) SJCw ---°F N37-22 W121-56 | 6d) SJCW ---°F SAN JOSE CA | 6e) SJCa ---°T CTAF 124.0 | 6f) SJCa --°T N37-22 W121-56 | 6g) SJCa ---°T SAN JOSE INTL CA | 6h) SJCw-SJCa Wind 020° at 15K | 6i) SJCw-SJCa GS ---K WCA ---° | 6j) At SJCa TTE 1:36 | 6k) At SJCa Fuel 295 lbs | 6l) At SJCa ETA 07:57 +1:04 | 6 |
In the upper left corner of the sample trip log, you can see that this trip totals 270 nm and 1:36 flying time.

Scanning down the right-hand column (i.e., column L) of the sample trip log, you can see that we took off from SMO airport at 06:22 zulu, passed VTU one minute behind schedule at 06:36, passed FLW one minute ahead of schedule at 06:59. and are estimated to cross the PRB waypoint (PRB 040°/9nm) in three minutes at 07:16. (Therefore, the time now must be 07:13 zulu.) The bottom right-hand comer of the trip log shows that we are estimating arrival at SJC airport at 07:57 zulu, which is 1:04 from now.
The top row of the trip log contains summary information for the trip as a whole:
| Column | Contents |
|---|---|
| A | total trip distance and flying time |
| B | great-circle distance from origin to destination |
| C | excess trip distance over great-circle distance |
| D | total trip fuel burn |
| E | average trip groundspeed |
| F | cruise true airspeed |
| G | cruising altitude |
| H | time to climb |
| I | time to descend |
| J | time in cruise |
| K | cruising fuel flow |
| L | actual takeoff Z time |
The remaining rows of the spreadsheet contain detailed information for each leg of the trip, as follows:
| Column | Contents |
|---|---|
| A | from-course, distance, flying time for this leg |
| B | from-fix frequency, waypoint info |
| C | from-fix latitude/longitude |
| D | from-fix facility name, state |
| E | to-fix frequency, waypoint info |
| F | to-fix latitude/longitude |
| G | to-fix facility name, state |
| H | winds aloft forecast for this leg |
| I | groundspeed, wind correction angle |
| J | total time enroute at to-fix. (time remaining) |
| K | total fuel burn at to-fix. (fuel required to dest.) |
| L | ETA, time remaining to to-fix (or ATA. early/late) |
The LCD display of the Flightmaster is only large enough to display one cell of the trip log at a time. When you first View a new trip log, you start off looking at the cell in the upper left-hand corner of the trip log...the one that shows the total trip distance and flying time. You can move to any other cell in the trip log using the four cursor keys ↑, ↓, ← and →.
In addition to moving around the trip log with the four cursor keys, View supports a number of keyboard shortcuts as follows
If you have either the PSION Printer II (pictured at left) or the PSION Comms Link RS232 serial communications adapter plus a suitable printer with a serial interface, you can print a hardcopy of the trip log. Simply select Print from the aviation menu.
If the Flightmaster isn't connected to the Printer II or the Comms Link, you will get an error message: Can't print.
Note: If you are using the Comms Link with a serial printer, refer to the Comms Link manual for details on hookup, setting baud rates, parity, handshaking, etc.
Initially (while you are still on the ground), the takeoff time and ATAs in the right-hand column of the trip log are blank (they appear as --:--). In order to fill these in during the course of the flight, you must tell the Flightmaster when you takeoff and when you reach each successive enroute fix.

To record your takeoff time or fix-crossing time, press the MODE and then EXE (while in the View function). The first time you do this, you record the current zulu time in the upper right-hand cell of the trip log (as your takeoff time). All the rest of the cells in the right-hand column will now show your ETA at each enroute fix and your destination. Each time you press MODE followed by EXE while in-flight, you record the current zulu time in the next cell of the right-hand column, changing its contents from an ETA to an ATA.
If you don't get a chance to record your takeoff or fix-crossing time right away, that's OK. Simply press MODE, adjust the zulu time display up or down using the + or - keys, and then press EXE to record the time. (For adjustments larger than a few minutes, you can use the ← and → keys to move the cursor to the time digit that you want to adjust.)
Suppose you get preoccupied and forget to record your takeoff time or a fix-crossing time altogether. That's also OK...all is not lost. When you cross the next fix, press MODE, use the ↑ and ↓ keys to scroll to the fix identifier that corresponds to the fix you just crossed, and then press EXE to record the time.
If you record a time and then later wish to cancel it out, press MODE, use the ↑ and ↓ keys to scroll to the fix identifier that corresponds to the ATA you want to cancel, press DEL to clear the time display to --:--. and then press EXE to make the cancellation effective.
Note: If this is starting to sound a little complicated for you to handle in-flight, keep in mind that 95% of the time all that you need to do is press MODE and then EXE when cleared for takeoff or when crossing a fix. Of course, there's no law that says you must use the Flightmaster's in-flight progress monitoring features at all, but once you've tried it you'll wonder how you ever lived without it.
Once you've used the Flightmaster's trip planning features to plan your trip and calculate your trip log, you can automatically display a standard FAA flight plan form with most of the 16 blocks already filled out for you...just what you need before you phone Flight Service.
| 1. Type | 2. AIRCRAFT IDENTIFICATION |
3. AIRCRAFT TYPE; SPECIAL EQUIPMENT |
4. TRUE AIRSPEED
|
5. DEPARTURE POINT | 6. DEPARTURE TIME | 7. CRUISING ALTITUDE |
|||
|---|---|---|---|---|---|---|---|---|---|
| VFR | PROPOSED (2) | ACTUAL (2) | |||||||
| IFR | |||||||||
| DVFR | |||||||||
| 8. ROUTE OF FLIGHT | |||||||||
| 9. DESTINATION (Name of airport and city) |
10. EST TIME ENROUTE | 11. REMARKS | |||||||
| HOURS | MINUTES | ||||||||
| 12. FUEL ON BOARD | 13. ALTERNATIVE AIRPORT(S) | 14. PILOTS NAME, ADDRESS & TELEPHONE NUMBER & AIRCRAFT HOME BASE |
15. NUMBER ABOARD | ||||||
| HOURS | MINUTES | ||||||||
| 16. COLOR OF AIRCRAFT | |||||||||
From the aviation menu, select FltPln→New to create a new flight plan on the standard 16-block FAA flight plan form. Blocks 2, 3, 14 and 16 automatically default to the pre-stored information for your aircraft. If a current trip log is active, blocks 4, 5, 7, 8, 9 and 10 automatically default to the pertinent trip-log information. The proposed departure time (block 6) defaults to one hour from now, rounded down to the nearest quarter-hour. The remaining blocks (1, 11, 12, 13 and 15) default to whatever you entered into the previous flight plan (or are left blank if there was no previous flight plan). You then have an opportunity to review and edit the flight plan, as described next.
From the aviation menu, select FltPln→Change to review and/ or change the current flight plan. You can scroll up and down through the 16 flight plan blocks using the ↑ and ↓ cursor keys, or use the digit keys 1,2,...,9,0 to go directly to blocks 1 through 10. To edit a block, press EXE, make the necessary changes, and then press EXE again. Press ON/CLEAR to return to the aviation menu.
From the aviation menu, select FltPln→Revrs to reverse the origin and destination, and to reverse the order of the route in the current flight plan.
From the aviation menu, select FltPln→Save to save the current flight plan for subsequent retrieval with the Load function. You are prompted with Save: followed by a default name under which to save the flight plan. The default name consists of the origin and destination identifiers separated with a hyphen (e.g., EWR-DCA), but you can edit this name if you wish. Press EXE to save the flight plan, or ON/CLEAR to abort it. If you try to save a flight plan with the same name as a previously-saved flight plan, you will see a warning message and be asked whether you wish to overwrite the saved flight plan with the new one.
From the aviation menu, select FltPln→Load to load a saved flight plan as the current flight plan. You will see Load: followed by the name of the first saved flight plan in the database Use the ↑ and ↓ cursor keys to select the saved flight plan that you want to load, then press EXE. Or press ON/CLEAR to exit this function without loading anything.
From the aviation menu, select FltPln→Erase to erase one or more previously-saved flight plans. You will see Erase: followed by the name of the first saved flight plan in the database Use the ↑ and ↓ cursor keys to select the saved flight plan that you want to erase, then press EXE to erase (you will be asked to confirm) or ON/CLEAR to exit without erasing.
If you have either the PSION Printer II or the PSION Comms Link RS232 serial communications adapter plus a suitable printer with a serial interface, you can print a hardcopy of the current flight plan. Simply select Print from the aviation menu. If the Flightmaster isn't connected to the Printer II or the Comms Link, you will get an error message: Can't print.
Weight-and-balance calculation is one of the most important preflight procedures affecting safety of flight. Many fatal accidents have resulted when an aircraft attempted to take off loaded over-gross or with C.G. out-of-envelope. Yet W&B is perhaps the most neglected procedure in general aviation. The Flightmaster makes W&B calculation so quick and easy that you'll never again have any excuse for taking off without being certain that your W&B is within the envelope. For Part 135 pilots (who are required to work a W&B for every flight and record the results on a load manifest), the Flightmaster can be a godsend.
Before you can work a W&B problem With the Flightmaster, you will have to define a W&B template for your aircraft. A W&B template defines:
If you fly several different aircraft, you will probably want to set up a W&B template for each of them. Remember, you only have to enter this information once. It becomes a permanent part of the Flightmaster's database. So get out your aircraft's Pilot Operating Handbook (POH) and most current W&B paperwork, photocopy the W&B Template Worksheet which appears on page 39, and let's design a W&B template...
As you read through this section, study this sample filled-in W&B Template Worksheet designed for a Cessna 310:
| Item Entries Only | Calc Entries Only | Envelope Entries Only | ||||||||||||
|---|---|---|---|---|---|---|---|---|---|---|---|---|---|---|
| Entry Type | Title | Multiplier | MaxVal | MaxCG | MinVal | MinCG | MidVal | MidCG | MaxWt | MinWt | CheckCG? | @Wt | MinCG | MaxCG |
| Item | BASIC EMPTY WT. | 1 | 3963 | 36.7 | 3963 | |||||||||
| Item | seats 1+2 (fwd) | 1 | 750 | 37 | 100 | 37 | 425 | 37 | ||||||
| Item | seats 3+4 (mid) | 1 | 750 | 68 | 0 | 68 | 400 | 68 | ||||||
| Item | seats 5+6 (aft) | 1 | 500 | 102 | 0 | 102 | 0 | |||||||
| Item | bag nose cmptmt | 1 | 350 | -31 | 0 | -31 | 30 | -31 | ||||||
| Item | bag left locker | 1 | 120 | 63 | 0 | 63 | 0 | |||||||
| Item | bag right locker | 1 | 240 | 63 | 0 | 63 | 25 | 63 | ||||||
| Item | bag aft cabin | 1 | 160 | 126 | 0 | 126 | 35 | 126 | ||||||
| CALC | ZERO FUEL (5015) | 5015 | 0 | N | ||||||||||
| Item | fuel tip-mains | 1 | 600 | 35 | 150 | 35 | 600 | |||||||
| Item | fuel wing-auxes | 1 | 378 | 47 | 0 | 47 | 0 | |||||||
| Item | fuel left locker | 1 | 120 | 49 | 0 | 49 | 0 | |||||||
| CALC | RAMP WT (5535) | 5535 | 0 | N | ||||||||||
| Item | less taxi fuel | -1 | 35 | 35 | 15 | 35 | 29 | 35 | ||||||
| CALC | TAKEOFF (5500) | 5500 | 0 | Y | ||||||||||
| Envelope | 4500 | 32.0 | 43.6 | |||||||||||
| Envelope | 5100 | 36.0 | 43.6 | |||||||||||
| Envelope | 5500 | 38.5 | 43.1 | |||||||||||
| Item | burn left locker | -1 | 120 | 49 | 0 | 49 | 0 | |||||||
| Item | burn wing-auxes | -1 | 378 | 47 | 0 | 47 | 0 | |||||||
| Item | burn tip-mains | -1 | 600 | 35 | 0 | 35 | 450 | 35 | ||||||
| CALC | LANDING (5400) | 5400 | 0 | Y | ||||||||||
It is best to design a W&B template for your aircraft on paper first, before trying to key it into the Flightmaster. Use the W&B Template Worksheet for that purpose. The information on the worksheet is laid out in the exact sequence that you will be keying it into the Flightmaster. Here's a description of the various columns on the Worksheet:
For item entries:
For calc entries:
For envelope entries:
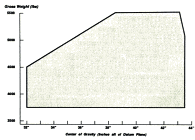
A set of envelope entries defines the shape of the allowable weight-vs.-CG envelope. Aircraft envelopes are usually shown in graphical form in the POH and are usually a rectangle or trapezoid with one or both top corners clipped off. The shape of the CG envelope is defined in the W&B template by specifying an envelope entry at each weight at which the envelope has a "corner". Two or three envelope entries are usually sufficient to describe the shape of such envelopes. Look at the envelope for the Cessna 310, for example:

Each envelope entry specifies three numbers:
You must enter the envelope entries in ascending order of @Weight (lowest weight first, highest weight last). The Flightmaster interpolates to find the allowable CG range for any intermediate weight. This scheme handles any envelope that takes the form of a polygon.
It is possible to enter a different envelope definition following each calc item for which the "Check CG?" parameter is Y. For example, you could specify an entirely different envelope for takeoff and landing. For most GA aircraft, however, a single envelope definition is sufficient.
The first time you enter a calc item for which the "Check CG?" parameter is Y, the Flightmaster prompts you to define an associated envelope (by entering one or more envelope entries) When you enter subsequent calc items for which the "Check CG?" parameter is Y, the Flightmaster asks you whether or not you want to use the same envelope.
Aircraft W&B Template Worksheet
| Item Entries Only | Calc Entries Only | Envelope Entries Only | ||||||||||||
|---|---|---|---|---|---|---|---|---|---|---|---|---|---|---|
| Entry Type | Title | Multiplier | MaxVal | MaxCG | MinVal | MinCG | MidVal | MidCG | MaxWt | MinWt | CheckCG? | @Wt | MinCG | MaxCG |
| Item | BASIC EMPTY WT. | 1 | - | - | - | - | - | - | ||||||
| Item | seats 1+2 (fwd) | 1 | - | - | - | - | - | - | ||||||
| Item | seats 3+4 (mid) | 1 | - | - | - | - | - | - | ||||||
| Item | seats 5+6 (aft) | 1 | - | - | - | - | - | - | ||||||
| Item | seats _________ | - | - | - | - | - | - | |||||||
| Item | bag aft | 1 | - | - | - | - | - | - | ||||||
| Item | bag nose | 1 | - | - | - | - | - | - | ||||||
| Item | bag ___________ | 1 | - | - | - | - | - | - | ||||||
| Item | bag ___________ | 1 | - | - | - | - | - | - | ||||||
| CALC | ZERO FUEL (____) | - | - | - | - | - | - | - | N | - | - | - | ||
| Item | fuel main tanks | 1 | - | - | - | - | - | - | ||||||
| Item | fuel aux tanks | 1 | - | - | - | - | - | - | ||||||
| Item | fuel __________ | 1 | - | - | - | - | - | - | ||||||
| CALC | RAMP WT (____) | - | - | - | - | - | - | - | N | - | - | - | ||
| Item | less taxi fuel | -1 | - | - | - | - | - | - | ||||||
| CALC | TAKEOFF (____) | - | - | - | - | - | - | - | Y | - | - | - | ||
| Envelope | - | - | - | - | - | - | - | - | - | - | ||||
| Envelope | - | - | - | - | - | - | - | - | - | - | ||||
| Envelope | - | - | - | - | - | - | - | - | - | - | ||||
| Envelope | - | - | - | - | - | - | - | - | - | - | ||||
| Item | burn __________ | -1 | - | - | - | - | - | - | ||||||
| Item | burn aux tanks | -1 | - | - | - | - | - | - | ||||||
| Item | burn main tanks | -1 | - | - | - | - | - | - | ||||||
| CALC | LANDING (____) | - | - | - | - | - | - | - | Y | - | - | - | ||
You must have defined a performance profile for an aircraft before you are allowed to define a W&B template for that aircraft. Starting from the aviation menu, make the following menu selections in sequence: Setup→W&B→Define. If the Flightmaster already has a W&B template in its database for the selected aircraft, you will hear a beep and see the following message:
Overwrite N54321 W+B? [Y/N]
to which you must respond by keying N to quit or Y to continue.

The Flightmaster now prompts you for various W&B template entries in the same sequence as they appear on your worksheet. First, you are prompted for an initial item entry with the default title BASIC EMPTY WT. When you complete each entry and answer Y to the Entry OK? prompt, you are prompted for the next item entry in turn. When you get to a point in the template where you want to enter a calc entry, simply press EXE at the Item title: prompt, and the prompt changes to Calc title:.
After you key in a calc entry, one of three things happens. If you answered N to the Check CG? prompt, you are prompted for the next item entry. If you answered Y to the Check CG? prompt and you haven't yet entered an envelope description, you are prompted for an envelope entry. If you have already entered an envelope description for a prior calc entry, you are asked if you'd like to Use same envelope? [Y/N], and if you answer Y you won't be bothered for another envelope description.
Where an envelope description is necessary, the machine prompts you for a succession of envelope entries. After the last envelope entry in the description, press EXE at the next Envelope at Weight: prompt.
When you are all finished entering the template entries, press ON/CLEAR at the next Item title: prompt. You are asked:
W+B definition completed? [Y/N]
If you press Y, you are asked:
OK to save N12345? [Y/N]
If you press Y, the template will be saved and you will wind up back at the aviation menu. You can then try to work a W&B problem.
To review and /or change any of the entries in a previously-entered W&B template, start from the aviation menu and select: Setup→W&B→Change. You can scroll up and down through the various entries in the template by using the ↑ and ↓ keys, and move through the various fields of each entry by using the ← and → keys.
If you want to change any item, press EXE. The item will move to the left of the display, and the cursor will appear. Now edit the item in the usual fashion, using cursor keys, DEL, and ON/CLEAR. When finished editing, press EXE. Now you can scroll up or down to another item.
When you're all done, press ON/CLEAR. If you have made any changes to the performance profile, you will see the message:
OK to save N54321? [Y/N]
to which you must respond by keying Y to save the revised W&B template in the Flightmaster's database, or N to discard the changes.
To erase a previously-entered W&B template from the Flightmaster's database, start from the aviation menu and select: Setup→W&B→Erase. You will see the message:
Erase W+B for N54321? [Y/N]
to which you must respond by keying Y to erase the W&B template from the Flightmaster's database, or N to retain it.
Make sure that the correct aircraft is selected (using Acft from the aviation menu). Now select W&B from the aviation menu. The Flightmaster retrieves the appropriate W&B template from its database, and displays the first entry (we'll be using the Cessna 310 template to illustrate):
BASIC EMPTY WT. 3963
Press the ↓ key to scroll down to the next W&B entry:
seats 1+2 (fwd) 425
To revise the weight for this item, press EXE, then edit the item as desired, then press EXE again. Alternatively, you can add or subtract any amount from the item by pressing + or -. then keying in the amount to add or subtract, and finally pressing EXE. To zero an item, press DEL. To toggle an item between its preset Min/ Mid/ Max values, press MODE.
You can scroll up and down through the various items and subtotals with the ↑ and ↓ keys, and revise the weight for each item as described above. As a shortcut, the ← and → keys will take you directly to the previous or next subtotal (skipping all the intervening items). For instance, pressing → at this point will take us directly to:
ZERO FUEL (5015) WtOK 4843
The WtOK in the lower left of the display indicates that 4843 is within the allowable weight range (in this case 0-5015). If the weight were out of range, you would hear a beep, and the OK would be replaced with either Hi or Lo plus an indication of how far overweight or underweight the subtotal is:
ZERO FUEL (5015) Hi 84 5099
Press MODE at this point to display the percentage of overweight or underweight:
ZERO FUEL (5015) Hi 84 2%
Now let's press → twice more, taking us to the entry for takeoff weight (the first CG-checked subtotal). At first the display shows as:
TAKEOFF (5500) WtOK Cg? 5427
...where the CG? indicates that the Flightmaster is calculating the CG and checking the envelope. After a second or so, the display changes to:
TAKEOFF (5500) WtOK CgOK 5427
The WtOK indicates that 5427 is within the allowable weight range, and the CgOK indicates that the CG is within the envelope. Press MODE at this point to display the CG position graphically:
TAKEOFF (5500) <--------------<
The arrow represents the allowable CG range, and the little underscore shows the relative location of the CG... close to the forward limit of the envelope in this example. (If you were over gross, pressing MODE would switch you to the percentage-over-weight display, and pressing MODE again would bring up the graphic CG position display.)
Press MODE once more to bring up a numeric display of CG position and min/ max CG limits at this weight (this information is required on a Part 135 load manifest):
C.G. = 38.594 [38.043, 43.191]
If the CG were outside of the envelope, you would hear a beep, and the display would have locked like this:
TAKEOFF (5500) WtOK Aft 5427

indicating that the weight is OK but the CG is aft of limit. Press MODE at this point to display the CG position graphically:
TAKEOFF (5500) <--------< _
Again, the arrow represents the allowable CG range, and the underscore shows the relative location of the CG... far aft of the aft limit of the envelope in this case. Definitely time to relocate some weight forward!
When you are all done checking your weight and balance, press ON/CLEAR at any entry. If you have changed any item values, you will be asked whether or not you want the new values saved for next time:
OK to save N12345? [Y/N]
Answer Y to save the changes or N to discard them. You will then find yourself back at the aviation menu.
The Flightmaster will memorize a set of personalized checklists that you design for your aircraft, and will sequence you through those checklists just like a copilot. The machine electronically "checks off" the items as you perform them, and reminds you of any items you may have skipped. You need only enter the checklist items once, although you can revise them anytime. If you fly several different aircraft, the unit will remember the checklists for all of them. If you fly single-pilot operations, this can be an invaluable safety feature.
First of all, you'll want to design a set of personalized checklists for your aircraft. Typically, you'll start with the "generic" checklists in your POH and personalize them for the particular equipment configuration of your aircraft and your own procedures.
An aircraft usually has a number of checklists: preflight, before start, engine start, before taxi, taxi, before takeoff, takeoff, cruise, before landing, after landing, securing, and perhaps various emergency checklists. Each checklist might contain anywhere from a few items to a few dozen. The Flightmaster has an upper limit of 300 checklist items per aircraft (enough to accommodate a very complex aircraft). If you fly several different aircraft, you may store several such sets of checklists in the database. (Lengthy checklists can consume a lot of the Flightmaster's internal memory, however, so don't get carried away.)
| »BEFORE START | »ENGINE START | »BEFORE TAXI | »DURING TAXI | »BEFORE TAKEOFF | »TAKEOFF |
| preflight door belts, harnesses controls park brake set fuel selectors gear sw down mixtures rich props forward throttles set all switches off ckt breakers in flight timer off batt&alt sws on lights as reqd rot beacon on nav lights gear pos lights warn lights test cowl flaps open! alt air off fuel guages chk totalizer set | props clear mag switches on crank & prime aux pumps low idle 1000 rpm oil pressure ok | avionics master do pax briefing avionics setup flt insts setup cabin air/heat taxi clearance brakes off | check brakes check gyros chk heading ind check flaps | brakes set fuel quantity ok fuel select main trim set for t/o flaps set prop sync off runup @ 1200 rpm chk alternators check vacuum check magnetos exercise props idle 1000 rpm friction adjust t/o clearance release brakes | ice protection doors, windows strobes on aux pumps low transponder on flight timer on full throttles check fuel flows check eng insts rotate 83 kias liftoff 92 kias climb 106 kias gear up aux pumps off |
| Here is a sample set of checklists for a light piston twin that you can use as a guide in designing your own personalized checklists for your aircraft. | |||||
|---|---|---|---|---|---|
| »MAX PERF T/O | »CLIMB | »CRUISE | »BEFORE LANDING | »AFTER LANDING | »SECURING |
| flaps 15 deg rotate 70 kias liftoff 82 kias clear obstacles gear up accel 106 kias flaps up auc pumps off | 115-130 kias 29" @ 2350 rpm lean to triangle | set cruise power lean using EGT close cowl flaps aux pumps off | fuel select main close cowl flaps aux pumps low prop sync off props 2300 rpm flaps 15 gear down, 3 grn flaps full min Vref 93 kias mixtures rich props forward | aux pumps off cowl flaps open strobes off transponder off flaps up | aux pumps off 1000 rpm avionics off turbos cooled idle cutoff magnetos off lights off bat&alt sw off control lock |
You must have defined a performance profile for an aircraft before you are allowed to define checklists for that aircraft. Start from the aviation menu, and make the following menu selections in sequence: Setup→Checklist→Define. If there is already a set of checklists for the selected aircraft, you will hear a beep and see the following message:
Overwrite N54321 checklist? [Y/N]
to which you must respond by keying N to quit or Y to continue.
The Flightmaster now prompts you for the title of the first checklist. Checklist titles may be up to 15 characters long, and normally are entered in uppercase. Key-in the checklist title followed by EXE:
| Checklist title: >BEFORE START | EXE |
Now type the first item on the before-start checklist, then press EXE. Checklist items may be up to 16 characters long, and normally are entered in lowercase:
| >BEFORE START preflight | EXE |
Continue keying each item on the before-start checklist in sequence. When you get to the end of the checklist, press EXE an extra time to bring up the Checklist title: prompt once again. (Pressing ON/CLEAR will work, too.) Now enter the title of the next checklist, followed by the items on that checklist.
Continue in this fashion until you have entered all of the checklists for your aircraft. Now, press ON/CLEAR to get to the Checklist title: prompt. Press ON/CLEAR a second time and you will see the last, checklist item you entered. (At this point, you could use the cursor keys to move around the newly-entered checklists and make any desired revisions...the procedure is described in the next section.) Press ON/CLEAR a third time and you will see:
OK to save N54321? [Y/N]
If you press Y, the checklists will be saved and you wind up back at the aviation menu.
Hint: You can insert, delete, or change checklist items later on, and you can add additional checklists at the end. However, you cannot change checklist titles or insert additional checklist titles between existing checklists. Consequently, if you need your checklists in a particular order, be sure to enter all necessary checklist titles from the outset, even if they contain just one dummy item such as: "(to be added)".
To make revisions to a set of previously-entered checklists, start from the aviation menu and make the following menu selections in sequence: Setup→Checklist→Change. The Flightmaster loads your checklists and displays the topmost item of the first checklist. You can move from one checklist to another by using the ← and → keys, and can scroll up and down through the various items in a checklist by using the ↑ and ↓ keys.
If you want to change any item, press EXE. The item will move to the left of the display, and the cursor will appear. Edit the item in the usual fashion, using cursor keys, DEL, and ON/CLEAR. When finished editing, press EXE. Now you can scroll up or down to another item, or left or right to another checklist.
To delete an item from any checklist, move to that item using the cursor keys, then press DEL to delete the item.
To insert additional items into any checklist, move to the item after which you'd like the new items to appear, then press MODE. You will see the message Insrt after Y/N? appear above the displayed checklist item. If you respond by pressing Y, you are prompted to key-in one or more new items that will be inserted into the checklist at that point. When you are finished entering the additional items, press an extra EXE or ON/CLEAR to terminate the insertion.
You can add additional checklists by positioning past the end of the last checklist. However, you can't insert new checklists in the middle, nor change existing checklist titles.
When you're done with your checklist revisions, press ON/CLEAR. If you have made any changes to the checklists, you will see the message:
OK to save N54321? [Y/N]
to which you must respond by keying Y to save the revised checklists in the Flightmaster's database, or N to discard the changes.
To erase a set of previously-entered checklists from the Flightmaster's database, start from the aviation menu and select: Setup→checklist→Erase. You will see the message:
Erase N54321 checklist? [Y/N]
to which you must respond by keying Y to erase the checklists from the Flightmaster's database, or N to retain them.
| »BEFORE START |
| preflight door belts, harnesses controls park brake set fuel selectors gear sw down mixtures rich props forward throttles set all switches off ckt breakers in flight timer off batt&alt sws on lights as reqd rot beacon on nav lights gear pos lights warn lights test cowl flaps open! alt air off fuel guages chk totalizer set |
To sequence through your checklists while in the cockpit. simply select ChkLst from the aviation menu. The Flightmaster retrieves the checklists for your aircraft from its database, and starts off displaying the top item of the first checklist. You can move from one checklist to another using the ← and → cursor keys, and can scroll through the items on a particular checklist with the ↑ and ↓ keys. When you reach the end of any checklist (except the last one), the Flightmaster beeps and flashes the message:
For next list press → key
The ChkLst function also has a more advanced mode of operation where you can electronically "check off" checklist items as you complete them. This lets you safely skip over certain checklist items and with the confidence that you can return to them later.
To use this "checkoff" feature, press EXE (instead of ↓) as you perform each checklist item...this causes the item to be "checked off" and advances to the next unchecked item on the checklist. To temporarily skip an item, press SPACE... this leaves the item "unchecked" and advances to the next unchecked item. When the last item of the checklist is reached, EXE and SPACE automatically recycle back to any unchecked items on the list. Only after all items on the checklist have been "checked off' will you see the message:
For next list press → key
Incidentally, if you scroll up or down using the ↑ and ↓ keys after using the "checkoff" feature, you will notice that the checked off items are marked on the left of the display With a check mark, while unchecked items have no such mark.
To exit the checklist function altogether, press ON/CLEAR. This takes you back to the aviation menu and erases all "checkmarks" from the checklists.
If you subsequently re-enter the ChkLst function, you will notice that you are positioned at the checklist item where you previously left off. To "rewind" back to the top of the first checklist, simply press DEL.
The Flightmaster can serve as an ordinary four-function arithmetic calculator. In addition, it can perform the tasks of a standard pilot's flight computer including true airspeed, density altitude, unknown wind, standard temperature, Mach number, and temperature rise. It also functions as a highly accurate timepiece (maintaining 24-hour zulu time and date), flight timer, tank timer. and approach timer.
| + | - |
| * | / |
| = | % |
From the aviation menu, select E6B→Calc. Then proceed as if you were using an ordinary four-function arithmetic Calculator. Use the digit keys 0...9, decimal point key, and the following function keys:
| + | plus |
| - | minus |
| * | times |
| / | divided by |
| = or EXE | equals |
| % | divided by 100 equals |
Operation is self-explanatory. Press DEL to correct keying errors or to clear the calculator's accumulator, and press ON/CLEAR to exit the Calculator and return to the aviation menu.
From the aviation menu, select E6B→TAS to calculate true airspeed, Mach number, true temperature, and temperature rise.
The Flightmaster prompts you to enter:
and calculates:
Use the ↑ and ↓ cursor keys to scroll through the various items and EXE to edit the input variables, ON/CLEAR exits the TAS function and returns to the aviation menu.
Do not omit the last two zeroes when entering pressure altitude.
You may enter the indicated temperature in degrees Fahrenheit if you enter a trailing F after the digits. (Since the keyboard will be in numeric mode, press SHIFT plus F.) The TAS routine will convert the temperature to Celsius and display the converted value.
If you don't specify otherwise, the machine assumes that the indicated temperature value is Ram Air Temperature (RAT), which is the kind of temperature displayed by the outside air temperature (OAT) gauge in most propeller-driven aircraft. If you're flying a jet with a fancy Total Air Temperature (TAT) gauge, enter a T after the digits. Or if you're entering Static Air Temperature (SAT) from a winds-aloft forecast, enter an S after the digits. (As mentioned previously, you'll have to press SHIFT.) The differences between RAT, TAT and SAT are insignificant at slow airspeeds, but become important above 200 KCAS or so.
| Example: |
Cal. Airspeed K? 160 EXE
Press Altitude? 17500 EXE Ind. Temp °C? -12 EXE True Airspeed 210 kt ↓ Mach Number 0.336 M. ↓ True Temperature -16.6 °C ↓ Temperature Rise 4.6 °C |
From the aviation menu, select E6B→DenAlt to calculate density altitude, standard temperature, and deviation from standard temperature.
The Flightmaster prompts you to enter:
and calculates:

Use the ↑ and ↓ cursor keys to scroll through the various items and EXE to edit the input variables, ON/CLEAR exits the DenAlt function and returns to the aviation menu.
Do not omit the last two zeroes when entering pressure altitude.
You may enter the outside air temperature in degrees Fahrenheit if you enter a trailing F after the numbers. (Since the keyboard will be in numeric mode, press SHIFT+F.) The DenAlt routine will convert the temperature to Celsius and display the converted value.
| Example: |
Press Altitude? 1950 EXE
Temperature °C? 2F EXE Density Altitude 4663 ft ↓ Std. Temp.= 11.1 °C ↓ Above Std. Temp= 22.2 °C |
From the aviation menu, select E6B→UnknownWind to calculate actual wind direction and velocity aloft.
The Flightmaster prompts you to enter:
and calculates:

Use the ↑ and ↓ cursor keys to scroll through the various items and EXE to edit the input variables, ON/CLEAR exits the UnknownWind function altogether and returns to the aviation menu.
If the course and heading that you enter are magnetic, the calculated wind direction will be magnetic. Likewise, if the course and heading that you enter are true, the calculated Wind direction will be true.
| Example: |
True Airspeed K? 210 EXE
Groundspeed K? 197 EXE Course? 330 EXE Heading? 320 EXE Wind Direction 255° ↓ Wind Velocity 38 kt |
TUE 15 MAR 1989 08:45:18
Flight Timer: Run 01:34:08
Select Time from the aviation menu to display the current date and time. You can also press the letter T while viewing the trip log. Press ON/CLEAR to exit.
From the aviation menu or while viewing the trip log, press the T key to bring up the current date/time display. Then use the ← and → cursor keys to view the flight, tank, and approach timers. Press ON/CLEAR to exit.
These three timers all operate the same way. Pressing EXE alternately starts and stops the timer. Pressing DEL stops the timer and resets it to 00:00:00. Although they are labelled as flight, tank, and approach timers, you can use them to time anything.
However, the flight timer has one special feature- whenever you enter your takeoff time into the trip log (by pressing MODE and EXE from within the View function), the flight timer automatically starts timing your flight.
The primary purpose of the Flightmaster's navigation database is to support its trip planning functions. In addition, however, the Flightmaster allows you to search its database in three different ways, to create RNAV waypoint definitions for any geographic location, to define your own navigation fixes, and to mark selected navaids inoperative. It also provides two methods for making backup copies of your user-defined database.
You can search the Flightmaster's built-in navigation database in three different ways: by fix identifier, by facility name, and by geographic location.
From the aviation menu, select DataBase→Find. At the prompt Fix ID:, key in the fix identifier and press EXE. The Flightmaster searches for the identifier in the built-in navigation database; if it can't find a fix with that identifier, it then tries the user-defined-fix database. The search takes about one second.
Use the ← and → cursor keys to view the various pages of information about the fix. Available information includes: identifier, facility name, state, class, frequency (CTAF if airport). elevation, magnetic variation, latitude and longitude. Press the ON/CLEAR key to return to the Fix ID: prompt to find another fix, and press ON/CLEAR again to return to the aviation menu.
If you enter a three-letter identifier which ambiguously identifies both a navaid and an airport (such as LAX, the identifier for both the Los Angeles International Airport and the Los Angeles VORTAC), the Flightmaster assumes that you mean the navaid. To specify that you mean the airport rather than the navaid, prefix the identifier with a K (e.g., KLAX).
The following abbreviations are used by the Flightmaster to denote facility class:
| T... | Terminal... |
| L... | Low-Altitude... |
| H... | High-Altitude... |
| VOR | VOR |
| VDM | VOR/DME |
| VTC | VORTAC |
| NDB | NDB |
| Arpt | Airport |
| Int | Intersection |
From the aviation menu, select DataBase→Find. If you don't know the fix identifier, press EXE at the Fix ID: prompt. You are then prompted for Partial name: (up to 13 characters) and asked which database segment to search: VORs, major airport s, or all airports. ("Major airports" are those with three-letter identifiers...no digits.) The selected database will be searched until the first match is found and displayed. The name-search may take awhile... up to 6 seconds for VORs, 10 seconds for major airports, and 20 seconds for all airports (worst case). To search for additional matches, press either the ↓ or EXE keys. To review previous matches, press the ↑ key.
Use the ← and → cursor keys to view the various pages Of information about each matching fix. Available information includes: identifier, facility name, state, class, frequency (CTAF if airport), elevation, magnetic variation, latitude and longitude. Press ON/CLEAR to return to the Fix ID: prompt to find another fix, and press ON/CLEAR again to return to the aviation menu.
From the aviation menu, select DataBase→Srch. This function allows you to search for all the airports or navaids within a specified radius of a given geographic location, and to view these fixes sorted by their distance from that anchor location. This function is similar to the "emergency search" function of database LORANs, but ever so much more useful. (What is the name of the VOR near Reno airport? Which GA reliever airports are closest to Boston Logan International? And so forth...)

You are first prompted to enter the anchor location of the search in your choice of three ways: Fix, Fix/Radial/Distance or Latitude/Longitude. Next, you are prompted to enter the search radius in nautical miles. Finally, you must choose whether you want to search for VORs, major airports, all airports, or intersections.
When the search is complete, you will see a display of the nearest fix, together with its magnetic bearing and distance from the anchor location. Use the ↑ and ↓ cursor keys to scroll to the other fixes, listed in order of ascending distance. Use the ← and → cursor keys to view additional information about each fix.
Pressing ON/CLEAR allows you to change the search radius or the database to be searched. Pressing ON/CLEAR again returns to the aviation menu.
From the aviation menu, select DataBase→Wpt. This function searches for all VORTACs and VOR/DMEs within a 100 nm radius of a given geographic location, sorts these navaids closest-to-farthest, and computes RNAV Waypoint definitions of the specified location based on each of the navaids.

You are prompted to enter the location of interest in your choice of three ways: Fix, Fix/Radial/Distance or Latitude/Longitude.
When the search is complete, you will see a display of the nearest navaid, together with its frequency, radial, and distance to the specified location:
OAK=OAKLAND 116.8 113°/6.2
Use the ↑ and ↓ cursor keys to scroll to waypoint definitions based on the other navaids, listed in order of ascending distance. Press ON/CLEAR to return to the aviation menu.
From the aviation menu, select DataBase→Def. This function allows you to add user-defined fixes in the navigation database. You are prompted in sequence for the following items:
For intersections, the prompts for facility name, state code, frequency and elevation are omitted.
Note: This same fix-definition routine is invoked automatically by the Flightmaster's trip-planning functions anytime you specify a route that contains one or more fixes that cannot be found in the navigation database.
From the aviation menu, select DataBase→Erase. This function allows you to erase one or more user-defined fixes. Use the ↑ and ↓ cursor keys to select the fix that you want to erase, then press EXE to erase (you will be asked to confirm) or ON/CLEAR to exit without erasing.
From the aviation menu, select DataBase→Inop. This function allows you to enter or edit a list of navaid identifiers that you wish to be excluded from the fix searches performed by the AutoVOR and AutoRNAV routing algorithms of the Flightmaster's trip-planning functions. The usual reason for doing this is that you have learned that one or more relevant navaids have been NOTAMed as inoperative. At the prompt, simply type a list of navaid identifiers separated by spaces, then press EXE.
The Flightmaster provides two different methods of making backup copies of your user-defined database (including aircraft performance profiles, weight-and-balance templates, checklists, saved routes, and user-defined navigation fixes). You can backup your data on a spare datapak. Alternatively, you can use the PSION Comms Link RS232 adapter together with your MSDOS-based personal computer to backup your data to disk.
From the aviation menu, select Backup→DataPak. The machine asks you to:
Fit backup pak in lower slot C:
and then shuts itself off. Remove the Flightmaster datapak from the lower slot on the reverse side of the unit, and plug in a spare datapak. (Any PSION datapak will do, but a 32K RAMpak is ideal.) Now press ON/CLEAR to turn the machine on again, select Backup or Restore according to which direction you wish to copy. The Backup procedure takes seconds using a RAMpack or minutes using a ROM-type datapak. The Restore procedure takes seconds regardless of datapak type. When copying is complete, the machine asks you to:
Fit normal pak in lower slot C:
and then shuts itself off. Remove the backup datapak and reinstall the Flightmaster datapak. Now press ON/CLEAR to turn the machine on again.

Plug the PSION Comms Link RS232 adapter into the accessory slot on top of the Flightmaster. Plug the RS232 connector into the COM1: serial port of your MSDOS-based PC. On the PC, execute the program CL.EXE supplied on DOS diskette with your Comms Link.
From the aviation menu, select Backup→CommLink. Then select Backup or Restore according to which direction you wish to copy. The machine proceeds to copy your files to or from the PC via the serial port. When copying is complete, the Flightmaster returns to the aviation menu.
Type Q on the PC keyboard to terminate the CL.EXE program and return to MSDOS. Then unplug the Comms Link from both the Flightmaster and the PC's COM1: port.
Backed-up Flightmaster files appear on the PC disk as files of type .ODB, and are ordinary ASCII files that may be edited with your favorite text editor.
Note: A Macintosh version of CL.EXE is also available. When ordering your Comms Link RS232 adapter, be sure to specify that you want the Macintosh version.
Here is a collection of unstructured suggestions that may help you get the most from your Flightmaster, but that didn't seem to fit in any other section of the User's Guide. Also a review of some Flightmaster accessories that you might find useful.
With its built-in sliding cover that protects the keyboard and datapacks when not in use, your Flightmaster is more rugged than most handheld electronic devices. However, the plastic window that covers the LCD display can be scratched, and the painted metal bezel that surrounds the display will show wear eventually.
To keep your machine looking new, it is a very good idea to keep it in a protective case (rather than just tossing it in your flight bag). We offer a tailored leather case with velcro closure for $30, and a zippered nylon case for $20. Alternatively, go to your local variety store or discount camera shop and pick up a case designed for a 110-film camera for about $10...it will fit the Flightmaster nicely and keep it from getting scratched up.
The most convenient way to use your Flightmaster in the cockpit is to mount it to the control yoke or to your yoke-mounted approach plate holder. This is easily accomplished with two small mating strips of velcro about two inches long. Attach one strip to the back of the Flightmaster on the metal bezel, and attach the other to your plate holder or the center of your yoke.
When mounting the Flightmaster to the yoke in this fashion, it is easier if you remove the sliding cover completely and leave it in your flight bag or the airplane's glove box.
You may find that velcro isn't strong enough to hold the Flightmaster to your yoke or plate holder while you do your pre-flight "controls free and correct" check. One solution is to use high-strength "super-lock" fastners (Radio Shack 64-2360, $2.49) instead of ordinary velcro. Another solution is to attach the Flightmaster to your yoke after doing the control check!
Although the Flightmaster's LCD display is not backlit, it has proven itself to be quite easy to use in the cockpit at night. If you mount the unit to your approach plate holder, and if you have sufficient light to read an approach plate, you should have no difficulty reading the Flightmaster display.
Here's a list of some Flightmaster accessories that you might want to consider purchasing at some point:
| AC adapter 63 accessory socket 7 accessories 7, 62-63 aircraft performance profile 5, 16 aircraft, selecting which to use 21 airport database 4 airway database 4 alphabetic mode 9 altitude, cruising 23 ambiguous fix identifiers 16 arrow (cursor) keys 10 automatic routing 24-25 automatic switch-off 13 aviation menu 12 battery 6, 8, 13 buzzer, piezoelectric 8 calculations arithmetic 49 density altitude 51 mach number 50 navigation 28 RNAV waypoint location 57 standard temperature 51 temperature rise 50 time and fuel 28 trip log 28 true airspeed 50 true temperature 50 unknown wind 52 calculator, four-function 49 case, protective carrying 61-63 cell of trip log 30 changing datapaks 14 checklists 5, 45 changing 47 checking off items 48 defining 46 designing 45 erasing 47 sample 45 using 48 clock setting time-of-day 12 use of zulu time 12 communications adapter 7, 59, 62 contrast wheel 9 CPU 7, 8 cruising altitude 23 current route 24 cursor 9 cursor keys 10 database access 55-58 backup 59 navigation 4 searching by facility name 56 by fix identifier 55 by geographic location 56 for RNAV waypoints 57 updates 4 user-defined 5 datapaks 4 changing 14 date and time, displaying 53 DEL key 10 density altitude calculations 51 display, liquid-crystal 7, 8 estimates, quick 15 EXE key 10 expanding the current route 26 FAA flight plan changing 33 creating 32 erasing previously-saved 33 loading previously-saved 33 reversing 33 reviewing 33 saving 33 FAA flight plan form 32 FAA's National Flight Data Center 4 fix identifiers, ambiguous 16 fixes, user-defined 5, 16, 58 four-function calculator 49 hardware 7-8 hints and kinks 61 identifiers, ambiguous 16 in-flight progress, recording 31 inoperative navaids 24, 58 internal memory 6, 7 intersection database 4 Jet Route airways 4 keyboard 9 cursor (arrow) keys 10 DEL key 10 EXE key 10 mode (alphabetic or numeric) 9 MODE key 10 ON/CLEAR key 9 SHIFT key 9, 10 SPACE key 10 low battery message 13 mach number calculations 50 memory, internal 6, 7 menus 11 microprocessor 7, 8 | MODE key 10 monitoring in-flight progress 31 National Flight Data Center 4 navaid database 4 navaids, inoperative 24, 58 navigating the menus 11 navigation database 4 navigation fixes, user-defined 5, 58 numeric mode 9 ON/CLEAR key 9 operating system 7 OPL programming language 7 performance profile 16 changing 21 defining 18 erasing 21 worksheet 17 peripheral devices available 7 Pilot's Operating Handbook (POH) 5, 16, 35, 45 power consumption 8 printer 7, 30, 33, 62 printing hardcopy 30, 33, 62 programs built-in 7 PSION Organiser II Model XP 7 quick estimates 15 replacing the battery 6, 13 RNAV locating RNAV Waypoints, 57 RNAV-direct routing, automatic 24 Waypoint notation 26 route amending 26 current 24 defining 22 erasing previously-saved 27 expanding 26 loading previously-saved 27 reversing 26 saving 27 sub-menu 22 RS232 Comms Link adapter 7, 30, 33, 59, 62 saved routes 5, 27 searching the database by facility name 56 by fix identifier 55 by geographic location 56 for RNAV waypoints 57 selecting which aircraft to use 21 setting the time-of-day clock 12 SHIFT key 9, 10 software updates 4 SPACE key 10 spreadsheet 28 standard temperature calculations 51 structure of menus 11 sub-menus 11 switching off 13 switching on 9, 13 temperature rise calculations 50 time-of-day clock 12, 53 displaying 53 setting 12 use of zulu time 12 trip log calculating 28 ETAs and ATAs 31 keyboard shortcuts 30 monitoring in-flight progress 31 organized as spreadsheet 28 viewing 30 trip planning 15 true airspeed calculations 50 true temperature calculations 50 unknown wind calculations 52 updates database 4 software 4 user-defined database 5 fixes 5, 16, 23, 58 defining 58 erasing 58 Victor airways 4 VOR database 4 VOR-to-VOR routing, automatic 24 waypoint notation 26 weight-and-balance 35 weight-and-balance calculation 42-43 weight-and-balance template 5, 35-40 changing 41 defining 40 designing 35-39 envelope (weight-vs.-CG) 38 erasing 41a sample 35 three types of entries 36 worksheet 39 wind (unknown) calculations 52 winds aloft 23 worksheet performance profile 17 weight-and-balance template 39 zig-zags in VOR-to-VOR routing 24 zulu time, use of 12 |
|---|